
This guide shows SharePoint admins how to install an AppSource add-in through the SharePoint admin center and make it available to users.
Required permission: You must be a SharePoint Administrator or higher in Microsoft 365.
Step by step
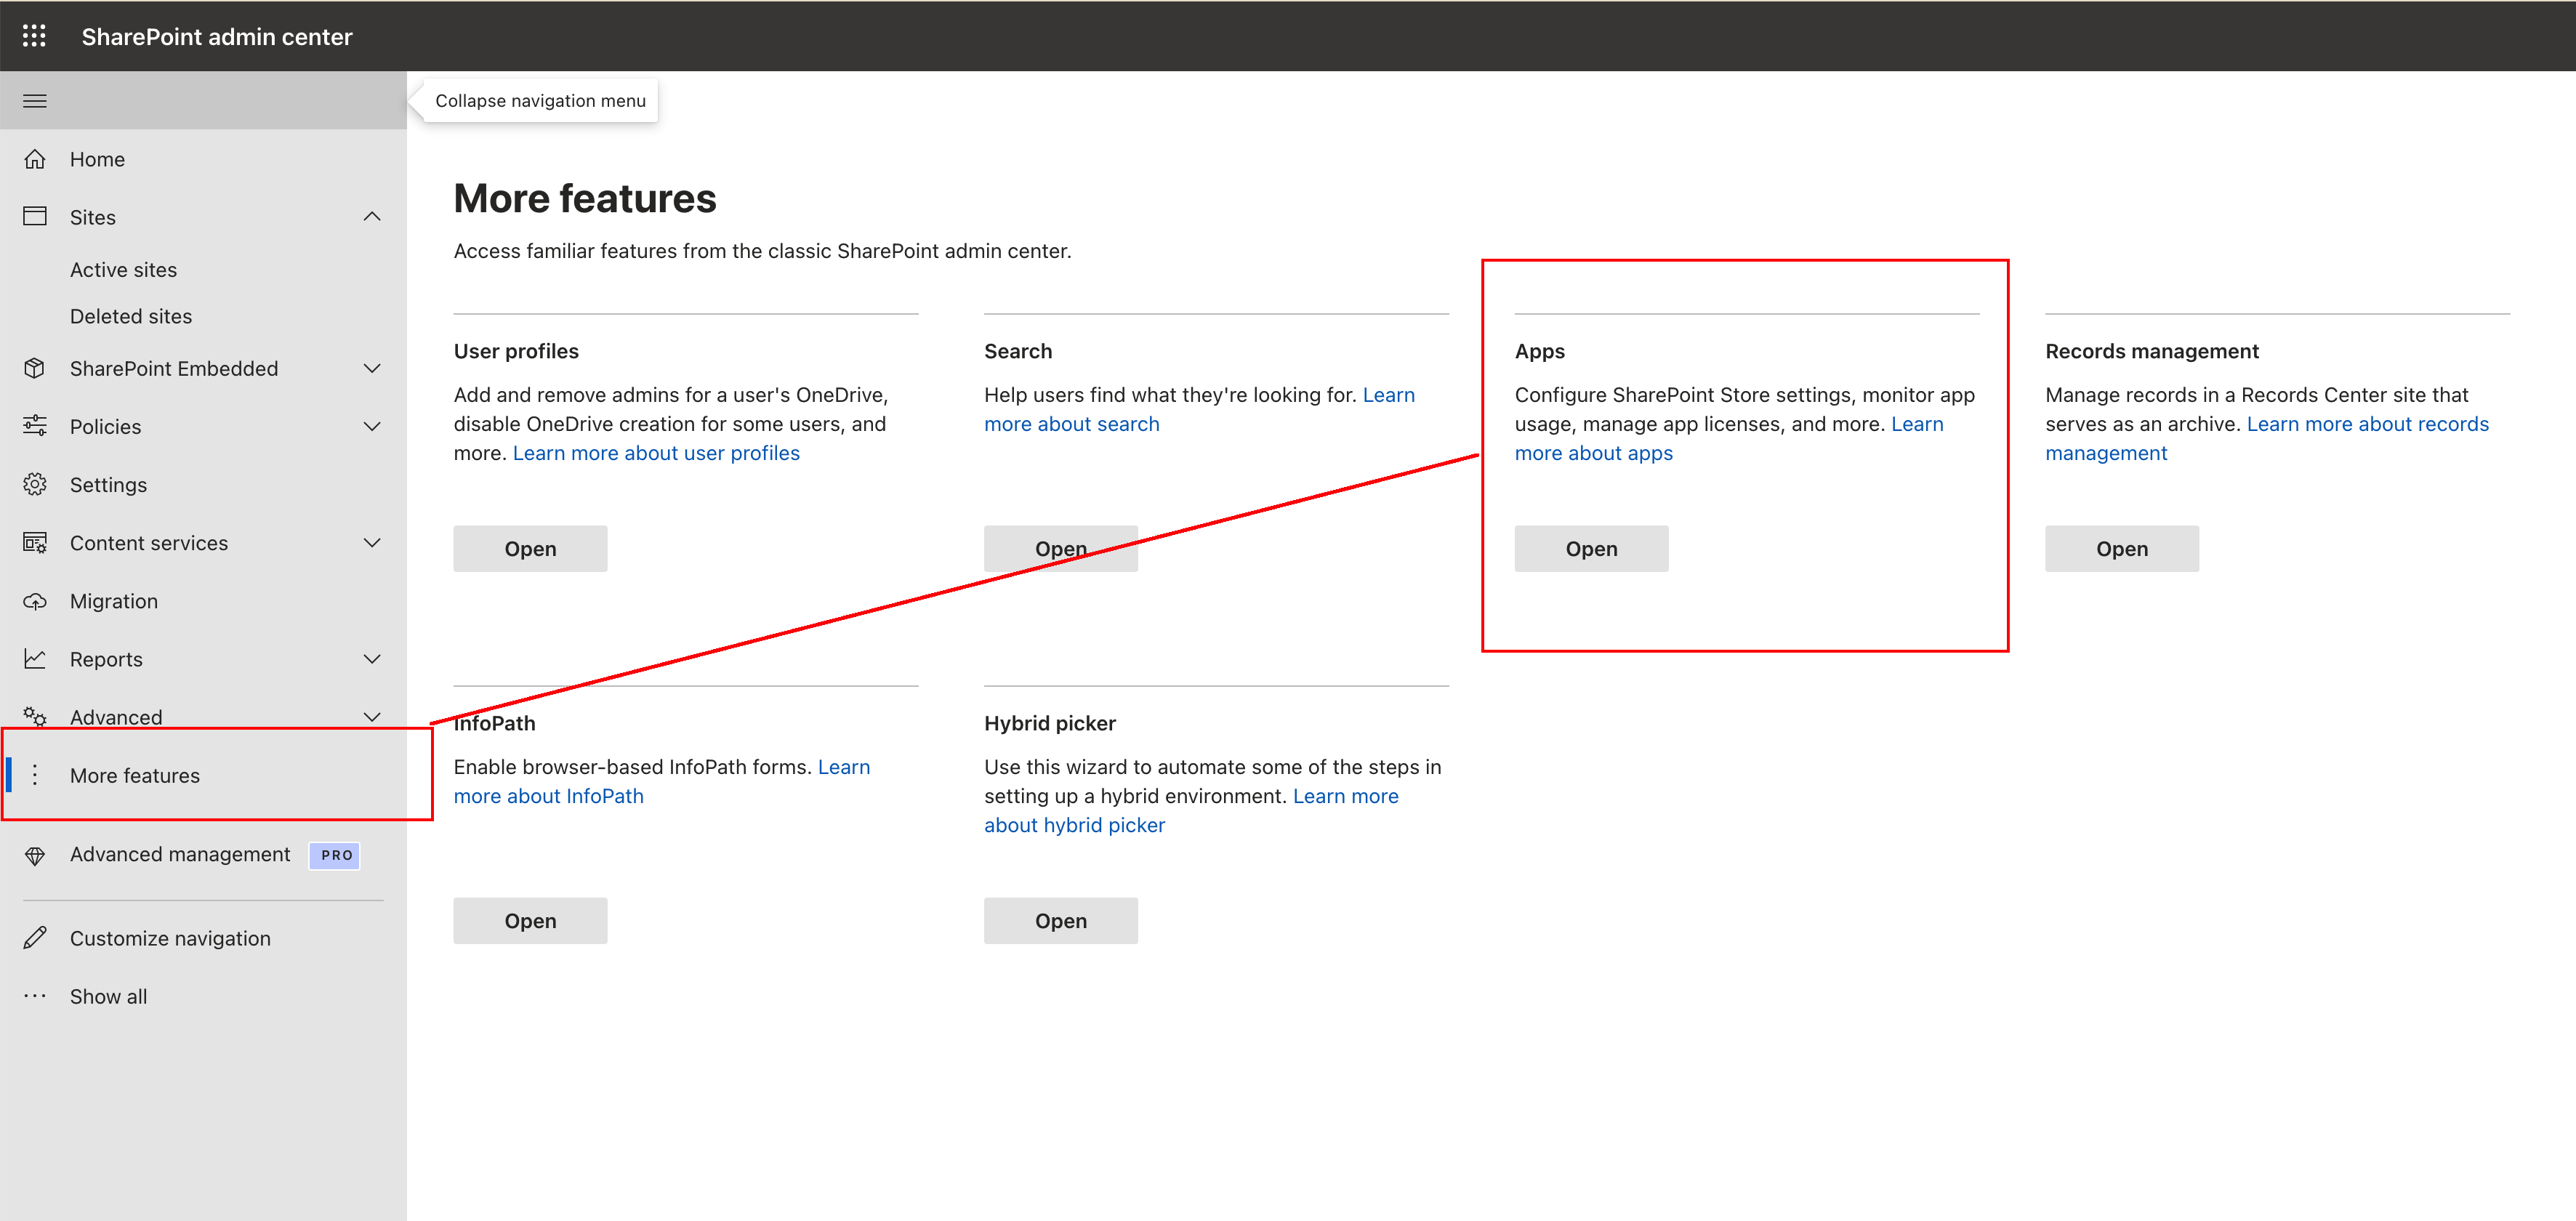
- Open the SharePoint admin center.
- Go to More features, then under Apps click Open.
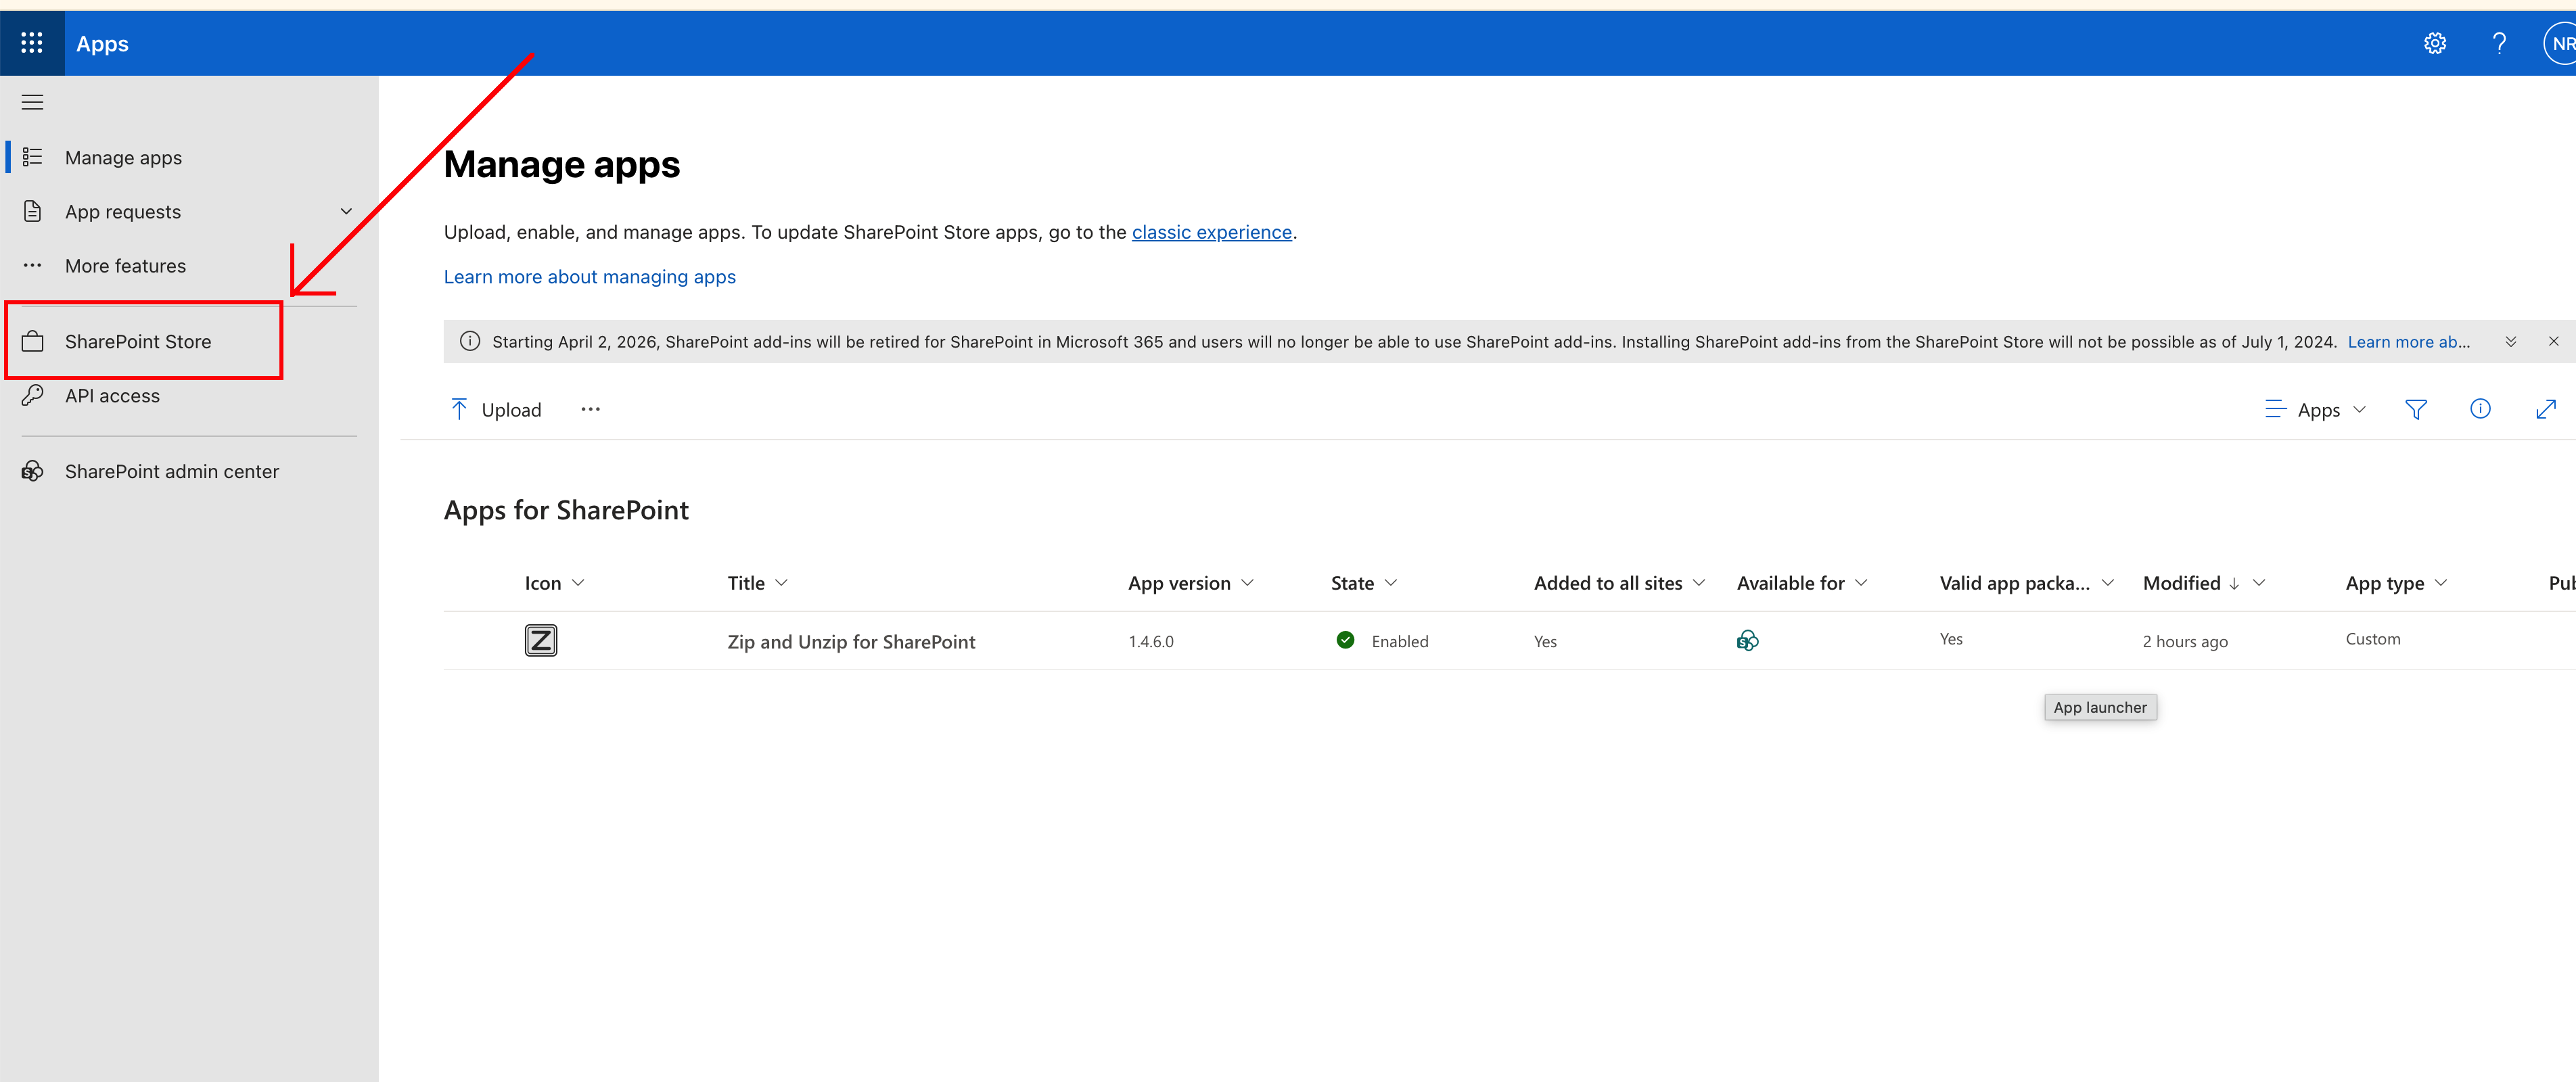
- Click App Store to open the SharePoint marketplace.
- Copy 1990Quebec and paste it into the SharePoint Store search box.
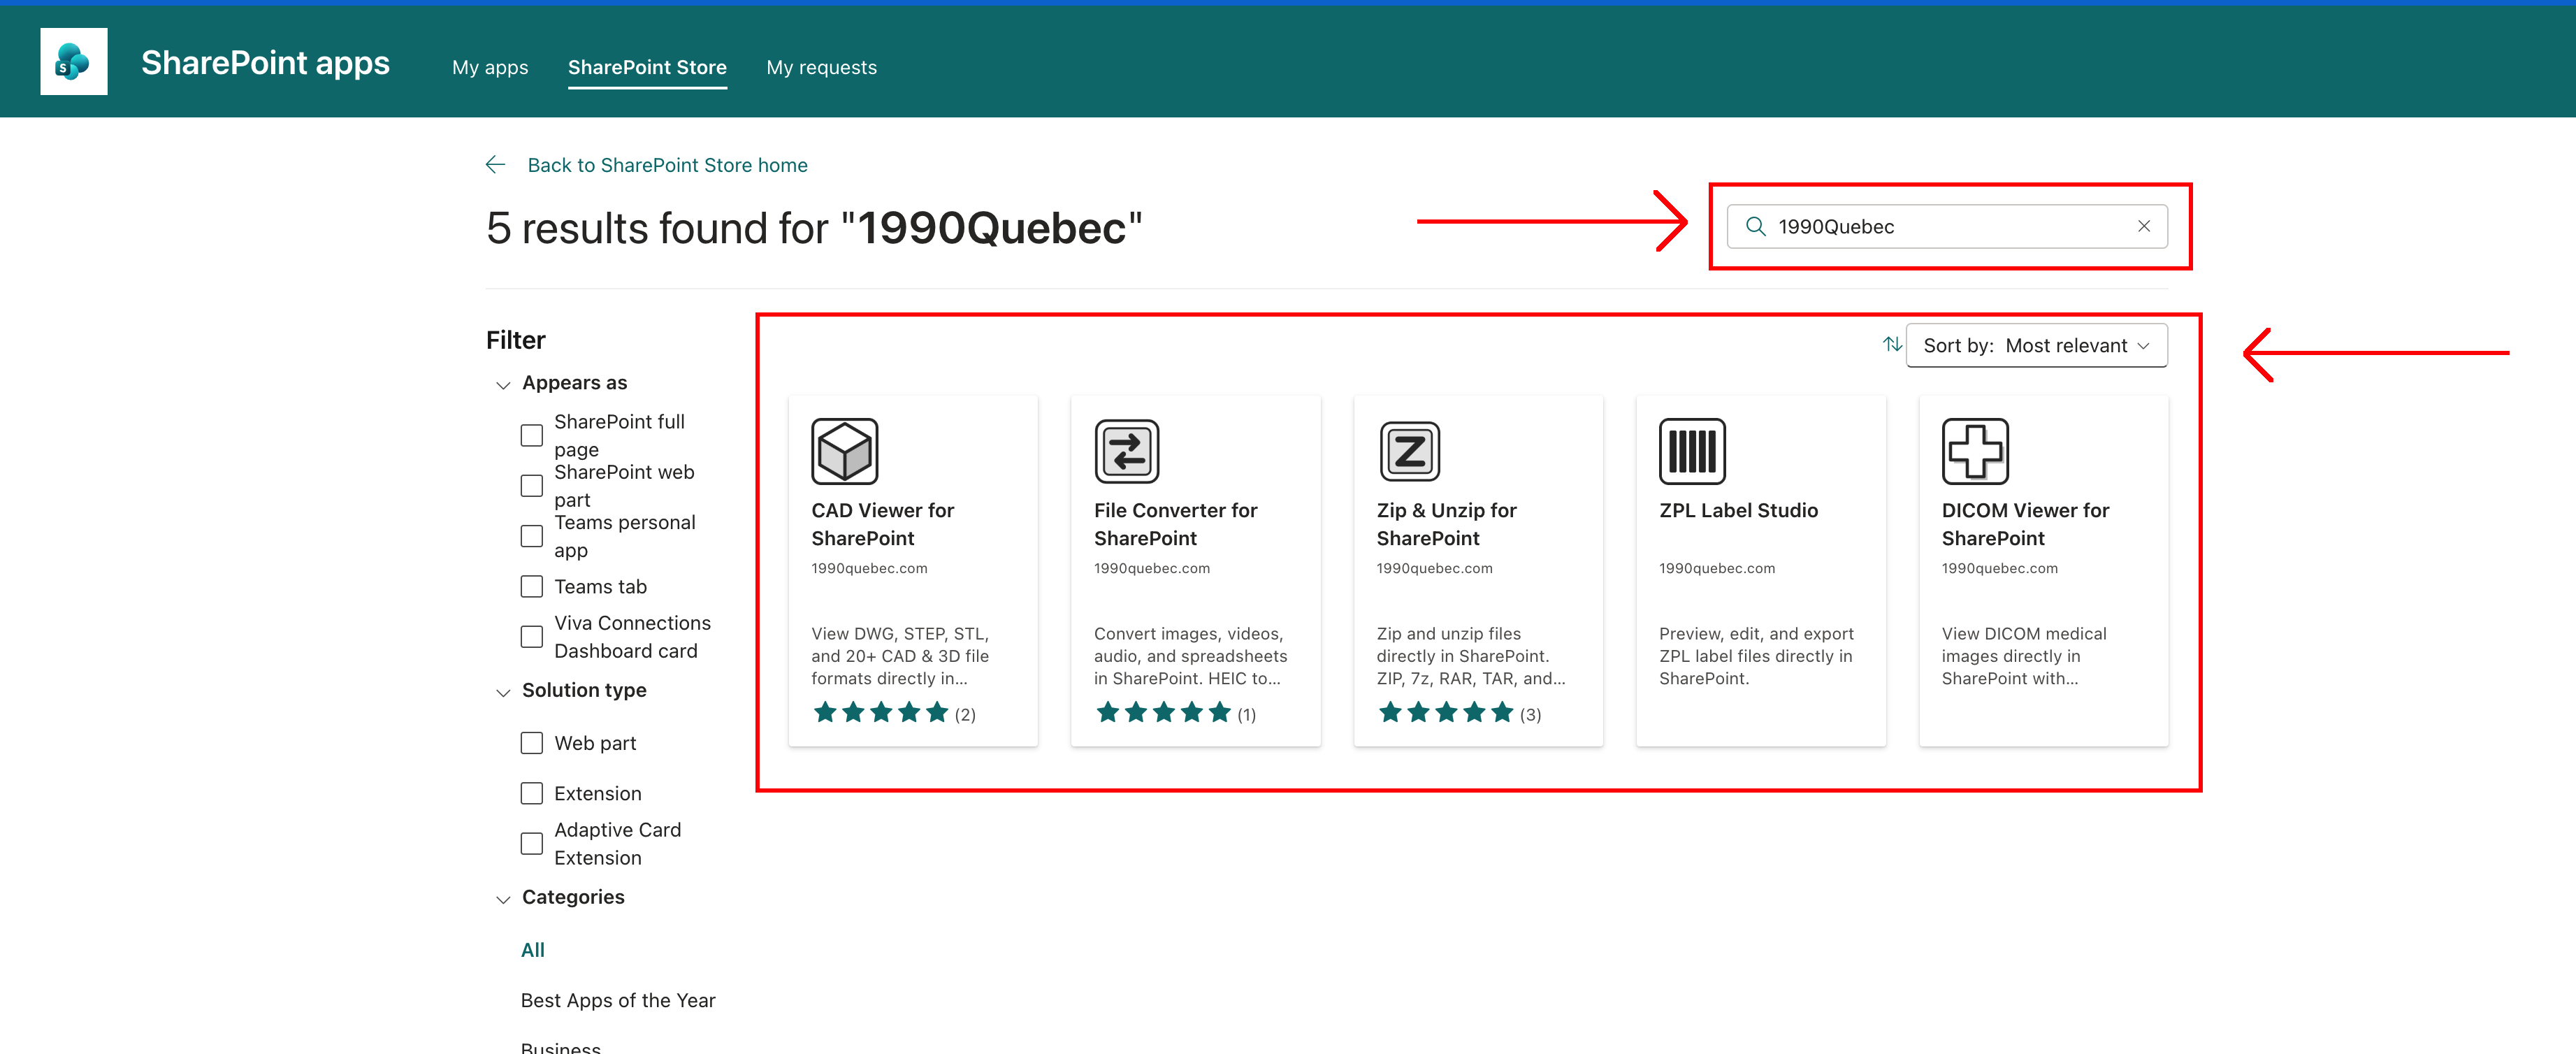
- Select the add-in you want from the 1990Quebec search results, then open its listing.
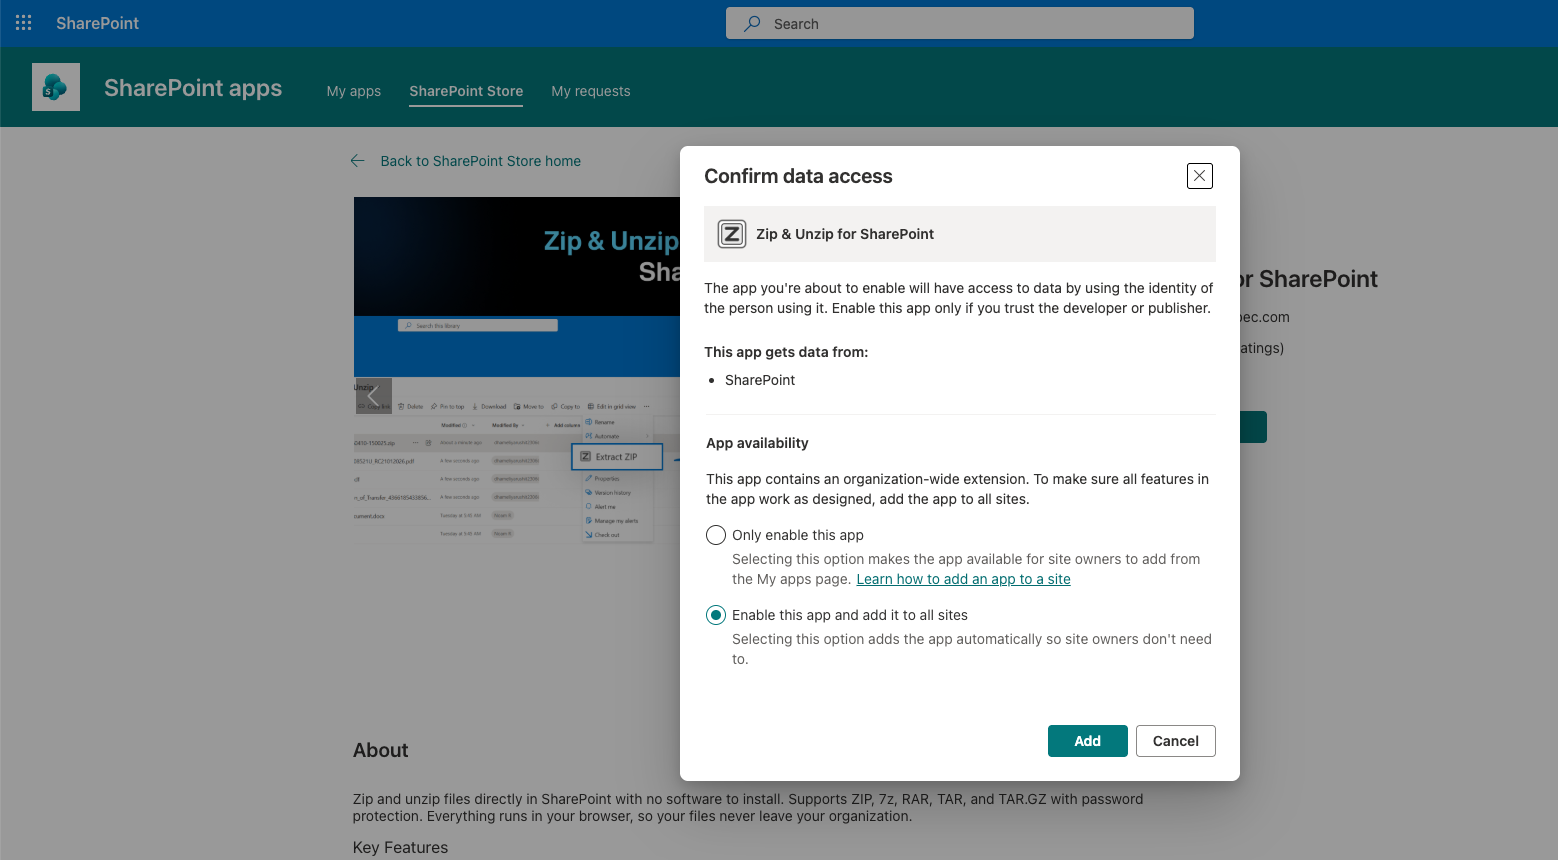
- On the add-in listing page, click Add to Apps Site.
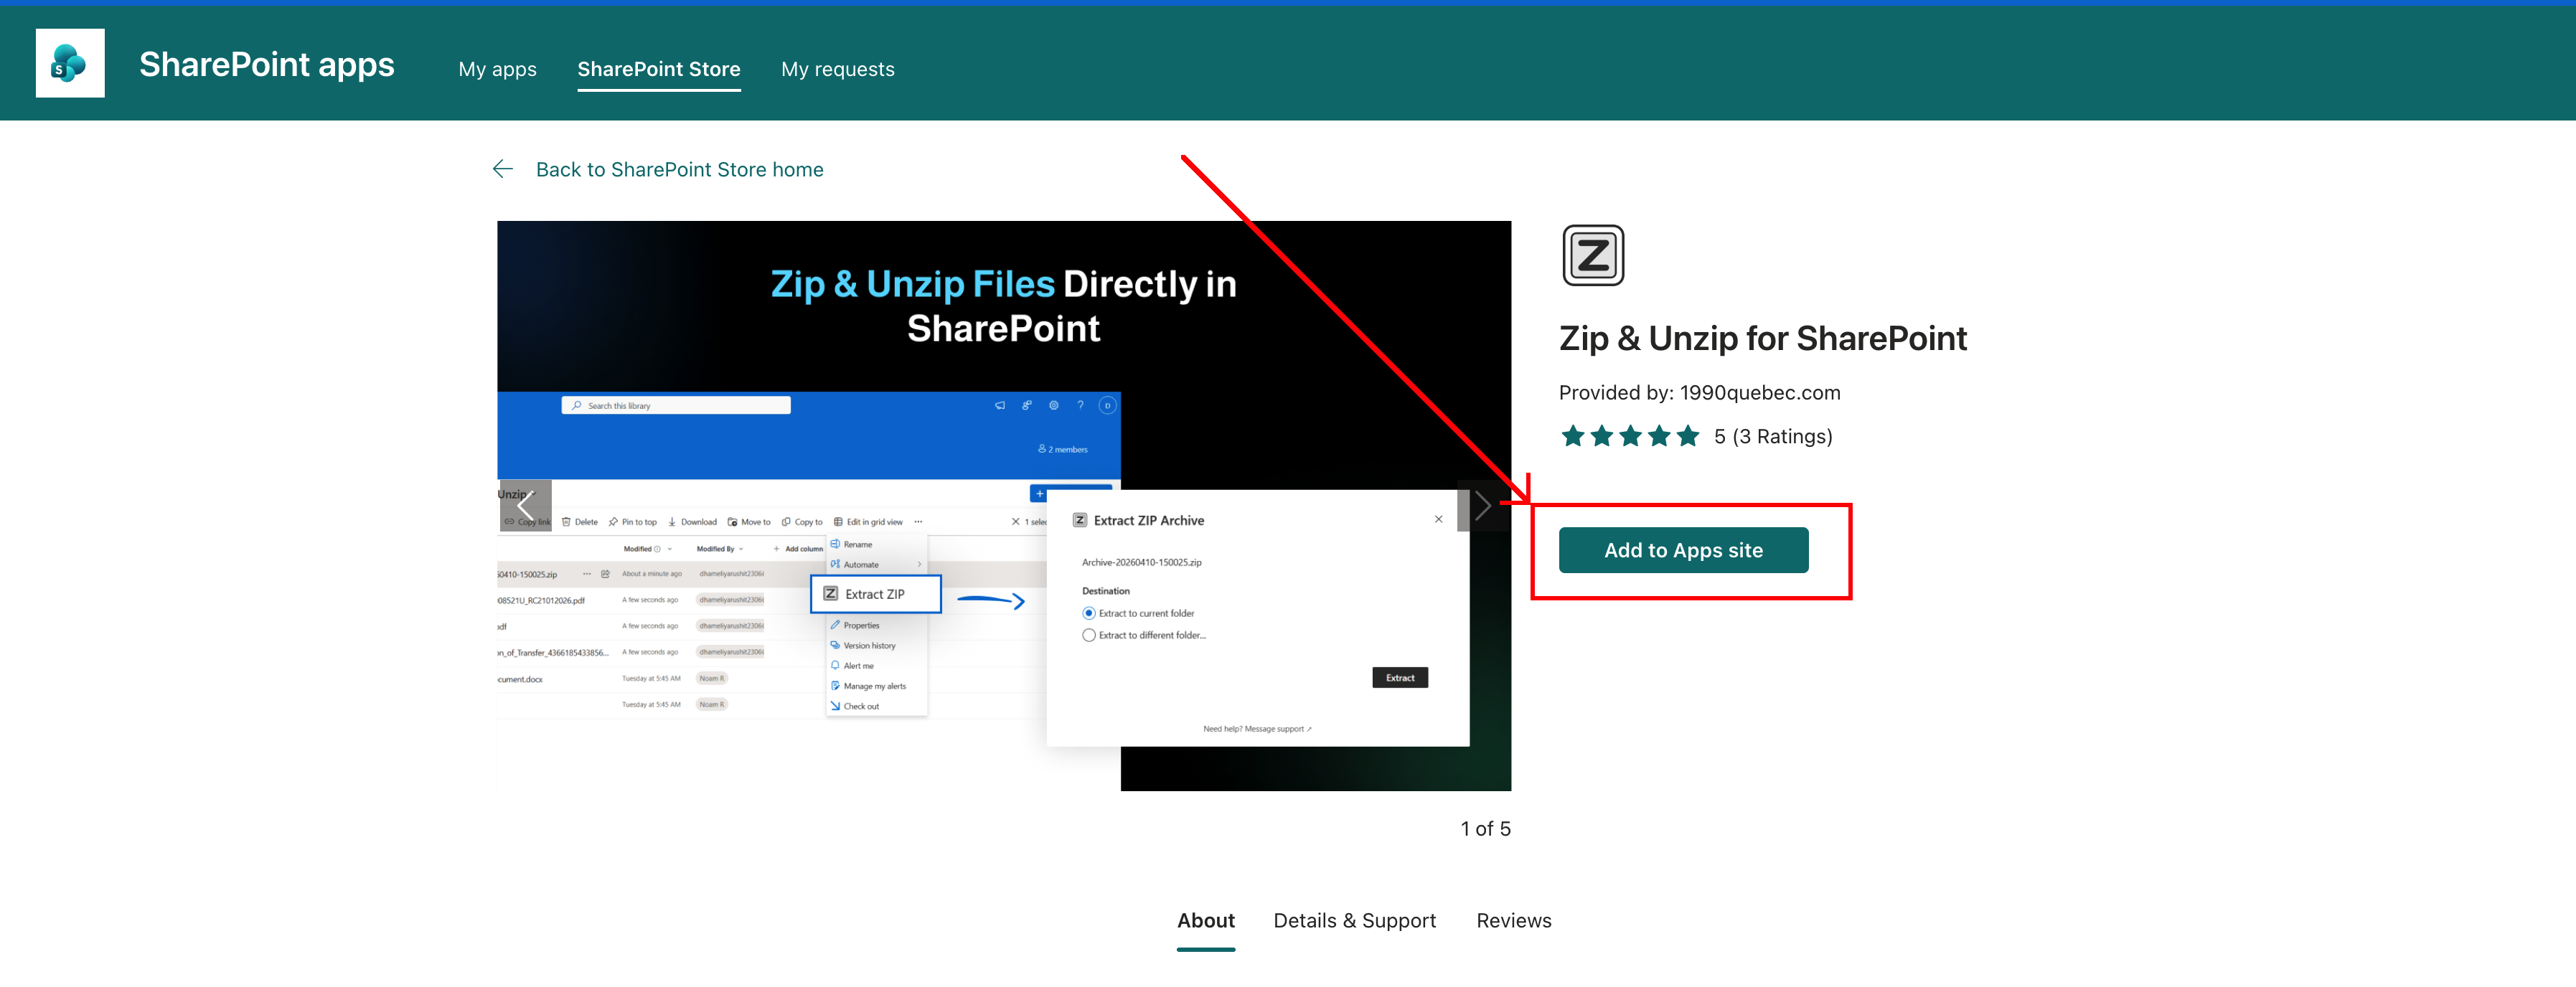
- When prompted by SharePoint, select Enable this app and add it to all sites.
-
Purchase a license for the add-in you installed.
- All plans include a 60-day full refund guarantee and can be canceled anytime from your dashboard.
- If an add-in is unlicensed, it runs as a limited free trial.
| Add-in | License page | Features |
|---|---|---|
| Zip & Unzip for SharePoint | Get a license | View features |
| File Converter for SharePoint | Get a license | View features |
| CAD Viewer for SharePoint | Get a license | View features |
| DICOM Viewer for SharePoint | Get a license | View features |
| ZPL Label Studio | Get a license | View features |
| Map Viewer 365 for SharePoint | Get a license | View features |
Installing multiple add-ins?
If your team wants to use multiple 1990Quebec SharePoint add-ins, we can offer bundle pricing. Contact us and tell us which add-ins you are interested in.
Need help?
Visit our help page.