
Summary
This post shows you how to keep one timer running across PowerPoint slides by using Timer for PowerPoint with presentation sync enabled.
This is useful for:
- A talk or activity that spans several slides but has one overall time limit.
- A rehearsal where you want to measure total elapsed time across the presentation.
To set it up:
- Add the add-in to each slide where you want the timer visible.
- Set a countdown duration, or choose Stopwatch mode to measure elapsed time.
- Enable Sync timers in this presentation in Settings, then start the timer once in Slide Show.
Changing slides keeps the same timer running. Pausing or resuming one linked timer updates the others. Leave sync off when each slide needs its own time limit.
Prepare the slides that need the timer
- In PowerPoint for the web, select the slide and open Home > Add-ins.

PowerPoint for the web. Select the screenshot to enlarge it.
- Enter Timer for PowerPoint in the search box (1). Under More search results, select Add beside the matching result (2).
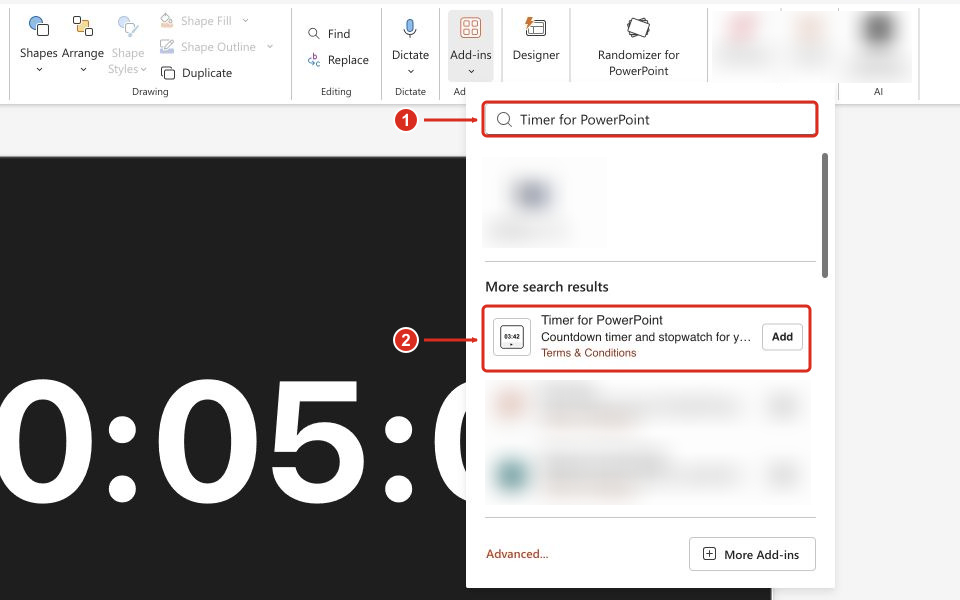
Complete the installation prompts. The timer appears on the selected slide. For other PowerPoint versions or organization-managed setup, see the full installation guide.
- Enter the total duration, such as 00:05:00 for a five-minute activity. For elapsed time, select Settings > Mode > Stopwatch instead.
- Place a Timer for PowerPoint instance on each other slide that needs the display. Position the timer so it leaves the slide's main content readable.
Enable presentation sync
- Choose the gear button labeled Settings at the timer's upper left.
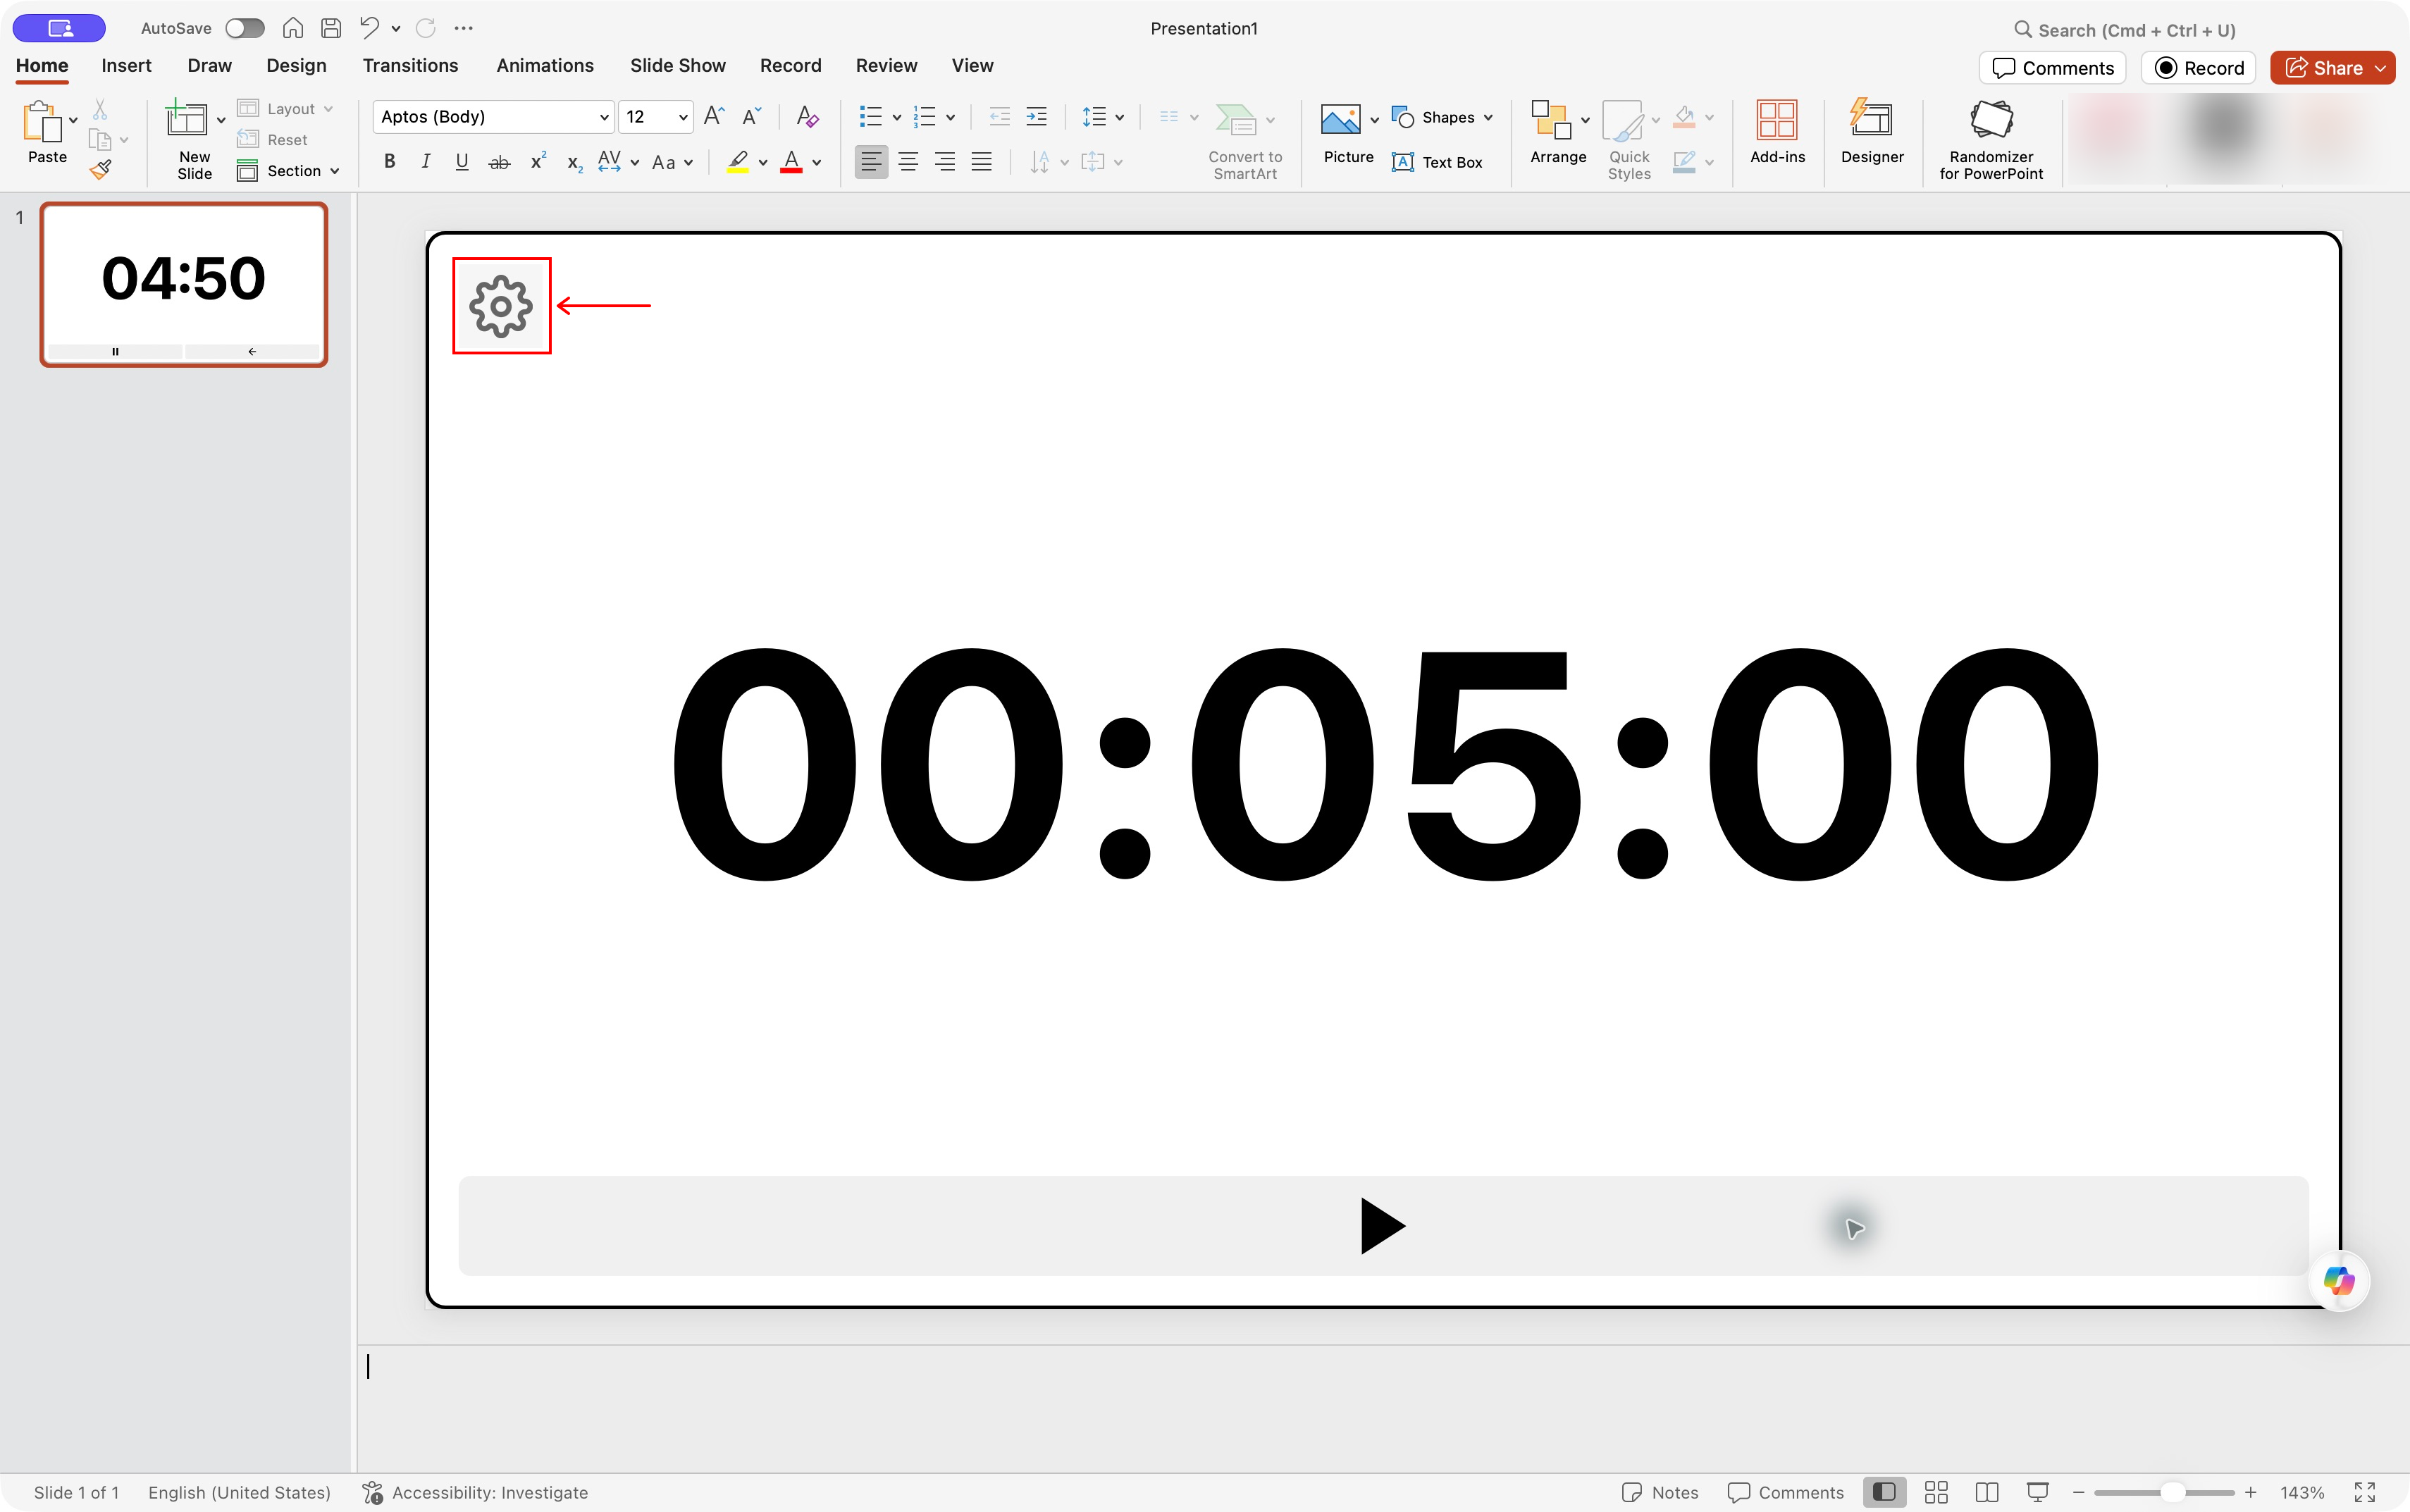
PowerPoint for Mac. Select the screenshot to enlarge it.
- Enable Sync timers in this presentation.
- Wait for Timers in this presentation are synced. before starting the session.
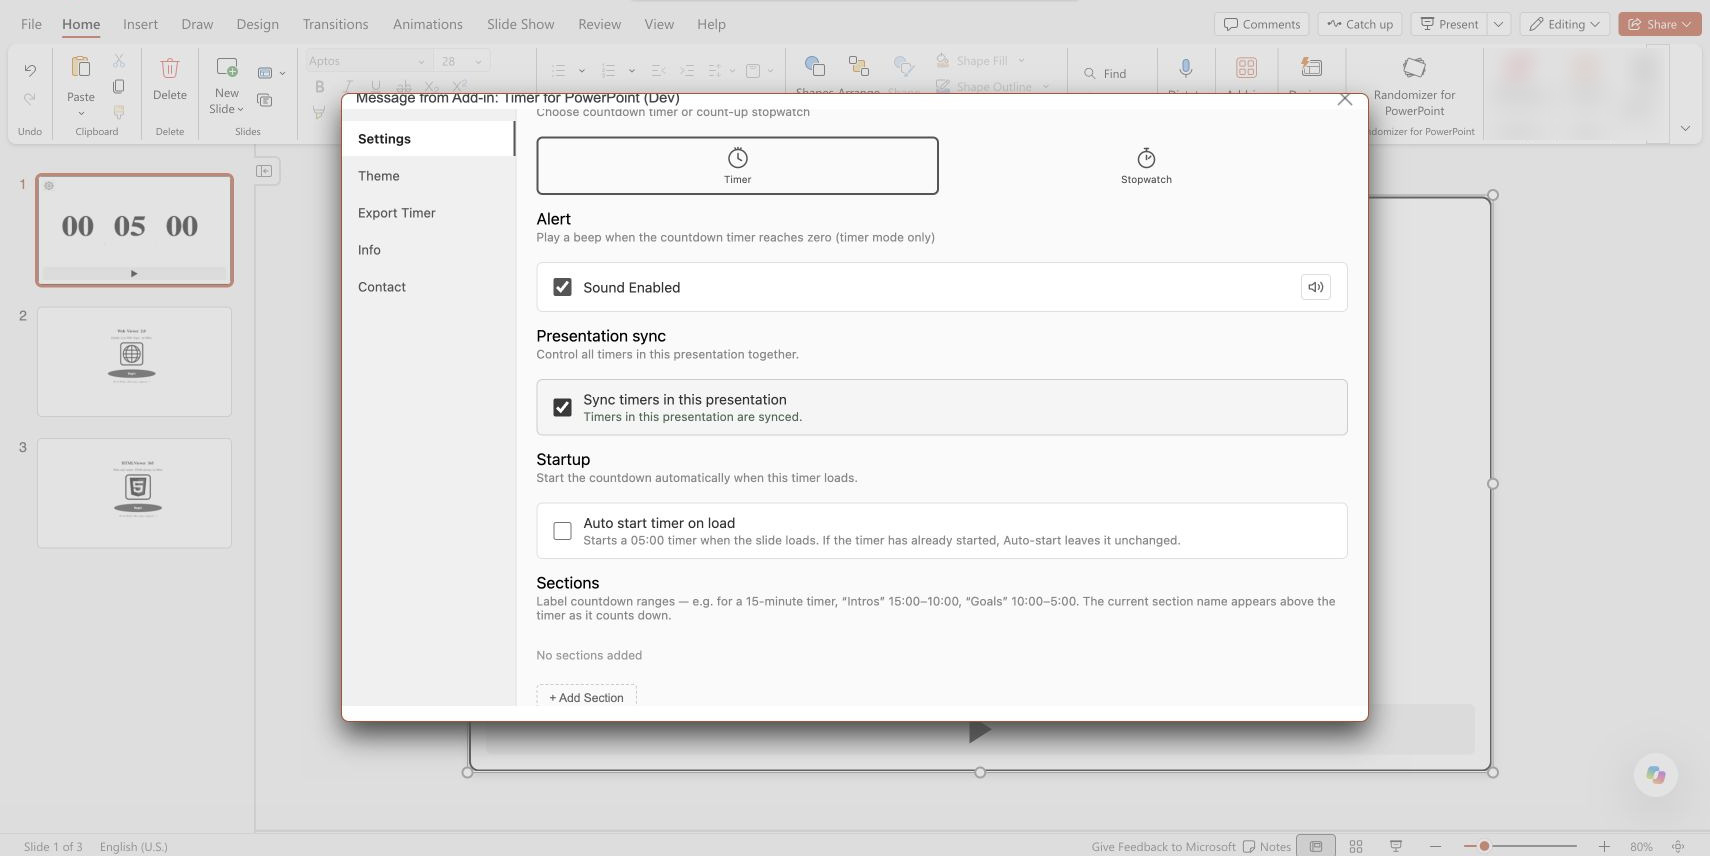
PowerPoint for the web. The Startup control appears below sync. Select the screenshot to enlarge it.
Sync depends on support in your PowerPoint version. If Settings reports that sync is unavailable, use independent timers or a separate shared browser timer.
Start once and change slides
- Close Settings, enter Slide Show, and press Start in the timer.
- Move to another slide containing Timer for PowerPoint and check that the display shows the same remaining or elapsed time.
- Use Pause and Resume when the session pauses. Those controls affect the linked timer state.
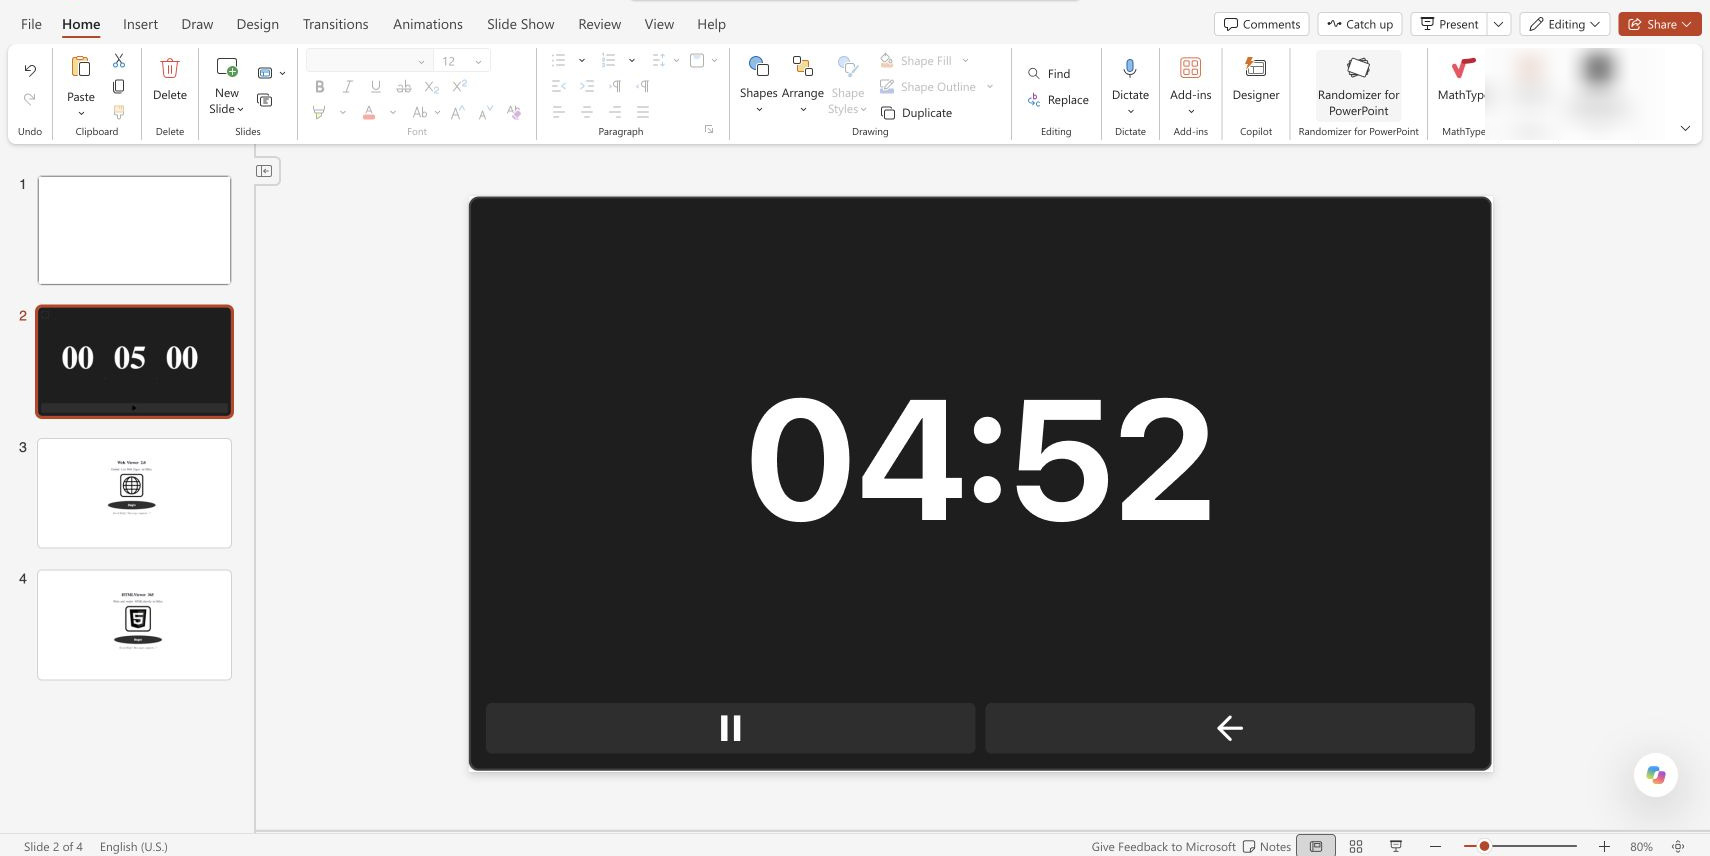
The shared countdown on a second slide in PowerPoint for the web.
After interacting with Timer for PowerPoint, click outside the add-in before using arrow keys to change slides.
Choose one shared clock or separate activity timers
- One talk across several slides: enable sync and start the countdown once.
- A fresh limit per quiz question: leave sync off. Start and reset each question's timer separately.
- A 25-minute focus period and a 5-minute break: use separate timers. See Pomodoro timer setups.
- A countdown visible to the speaker at a live event: use an on-slide or browser display from the stage timer guide.
Understand sync and auto-start
Auto start timer on load starts an unstarted timer when it loads. It leaves a running, paused, or finished timer unchanged. Auto-start controls how timing begins; presentation sync controls which instances share that timing. Neither setting advances slides. The Settings screenshot above shows the Startup option unchecked.
Native animation timers and timer videos play independently on each slide. Copying them does not create a shared clock.
If the displays disagree, check that both timers belong to the same presentation and show the synced status. Contact support with your PowerPoint version and operating system if the problem continues.