
Summary
This post shows you how to control when PowerPoint advances each slide by recording your rehearsal or entering an exact display time.
Recorded timings preserve your speaking pace. Fixed durations suit slides that need the same amount of time, such as a rotating information display. Choose one method:
- Option A: Rehearse Timings. Present at your intended pace, advance each slide when ready, and save the recorded times when you finish.
- Option B: Exact slide durations. Select a slide, enable Transitions > After, and enter the number of seconds before the next slide.
Enable Use Timings to play either setup automatically. Turn it off to advance manually. These settings control slide changes; they do not put countdown numbers on the slide.
Option A: Record your pace with Rehearse Timings
- Open the presentation in desktop PowerPoint. On the Slide Show (1) tab, choose Rehearse Timings (2).

Rehearse Timings starts timing immediately. PowerPoint for Mac shown.
- Speak through the slide, then choose the Next arrow (1) when you would advance during the real presentation. Repeat for each slide.
- Use Pause (2) at the upper left during an interruption. The control changes to a triangle; choose it to resume timing.
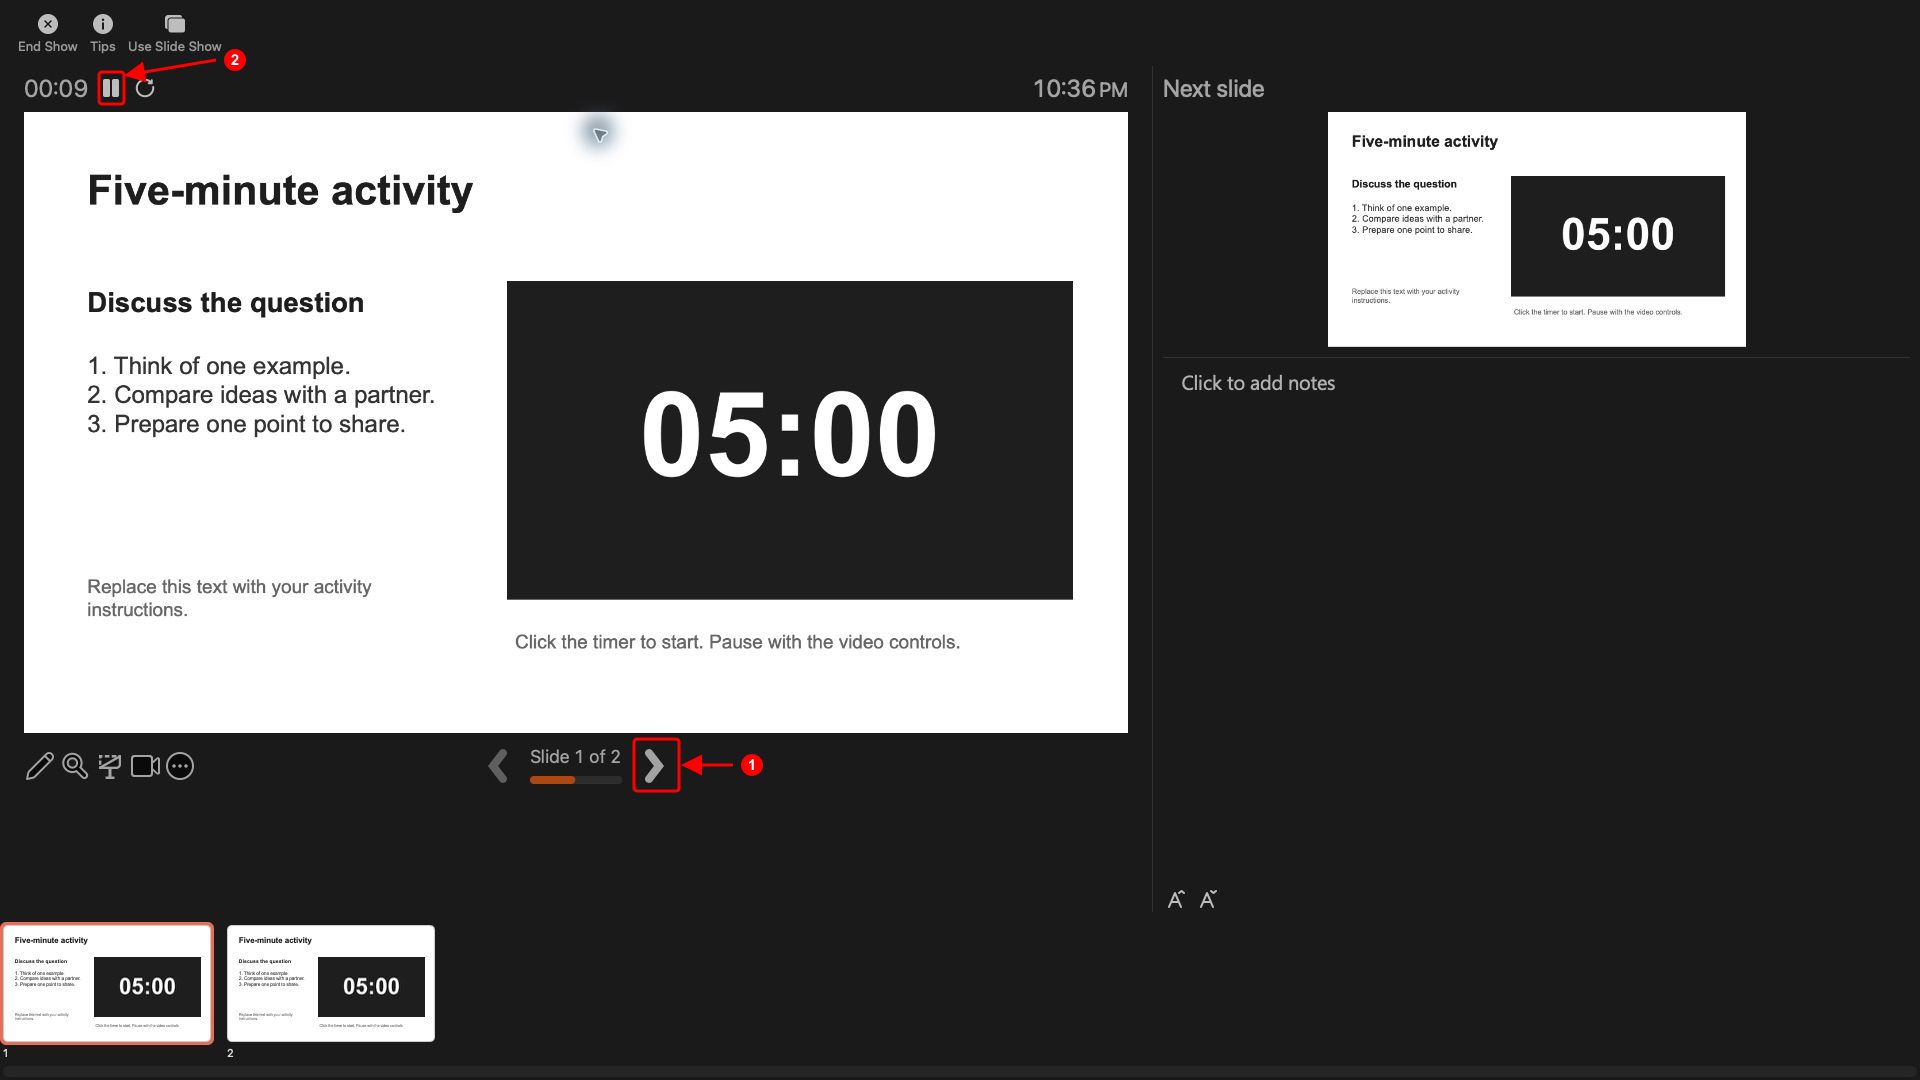
Mac uses a Presenter View layout for rehearsal. Its upper-left timer records your pace; the large 05:00 is separate slide content.
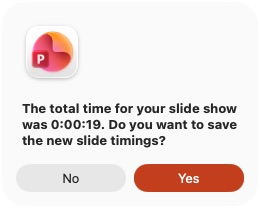
- Advance past the final slide. Choose Yes to keep the timings, or No to discard this rehearsal.
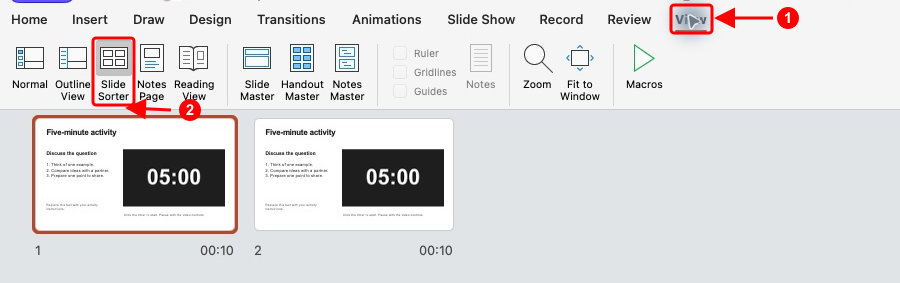
- Open View (1) > Slide Sorter (2) to review the saved time below each slide.
See Microsoft's Rehearse Timings instructions for the corresponding Windows controls.
Option B: Set an exact time with Transitions
- Select the slide and open Transitions (1).
- Enable After (2), click its time field, and enter the required seconds. For a ten-second slide on Mac, enter 10.00 and press Enter.
- Repeat for the other slides. Choose Apply to All (3) only when every slide should use the same transition and timing.

After sets the slide's display time. Duration sets how long the transition effect takes. Microsoft's self-running presentation guide explains both controls.
Play with timings, or return to manual control
- Open the Slide Show tab and enable Use Timings.

- Start the presentation from the beginning. Let it run without clicking to check the automatic changes.
- For a talk you control yourself, turn off Use Timings before presenting. The stored times remain available for later playback.
To measure a talk without saving slide timings, use the Presenter View timer. For a countdown the audience can see, follow the on-slide timer guide.