
This guide covers CAD Viewer end to end:
- Install CAD Viewer in your SharePoint tenant.
- Open CAD files in SharePoint.
- Add a CAD Viewer tab in Microsoft Teams.
CAD files render in the browser, so no desktop CAD software is needed.
Required permission: installing the add-in requires a SharePoint Administrator or higher in Microsoft 365. Opening CAD files afterward needs no special role.
Part 1: Install CAD Viewer in your tenant
- Open the SharePoint admin center.
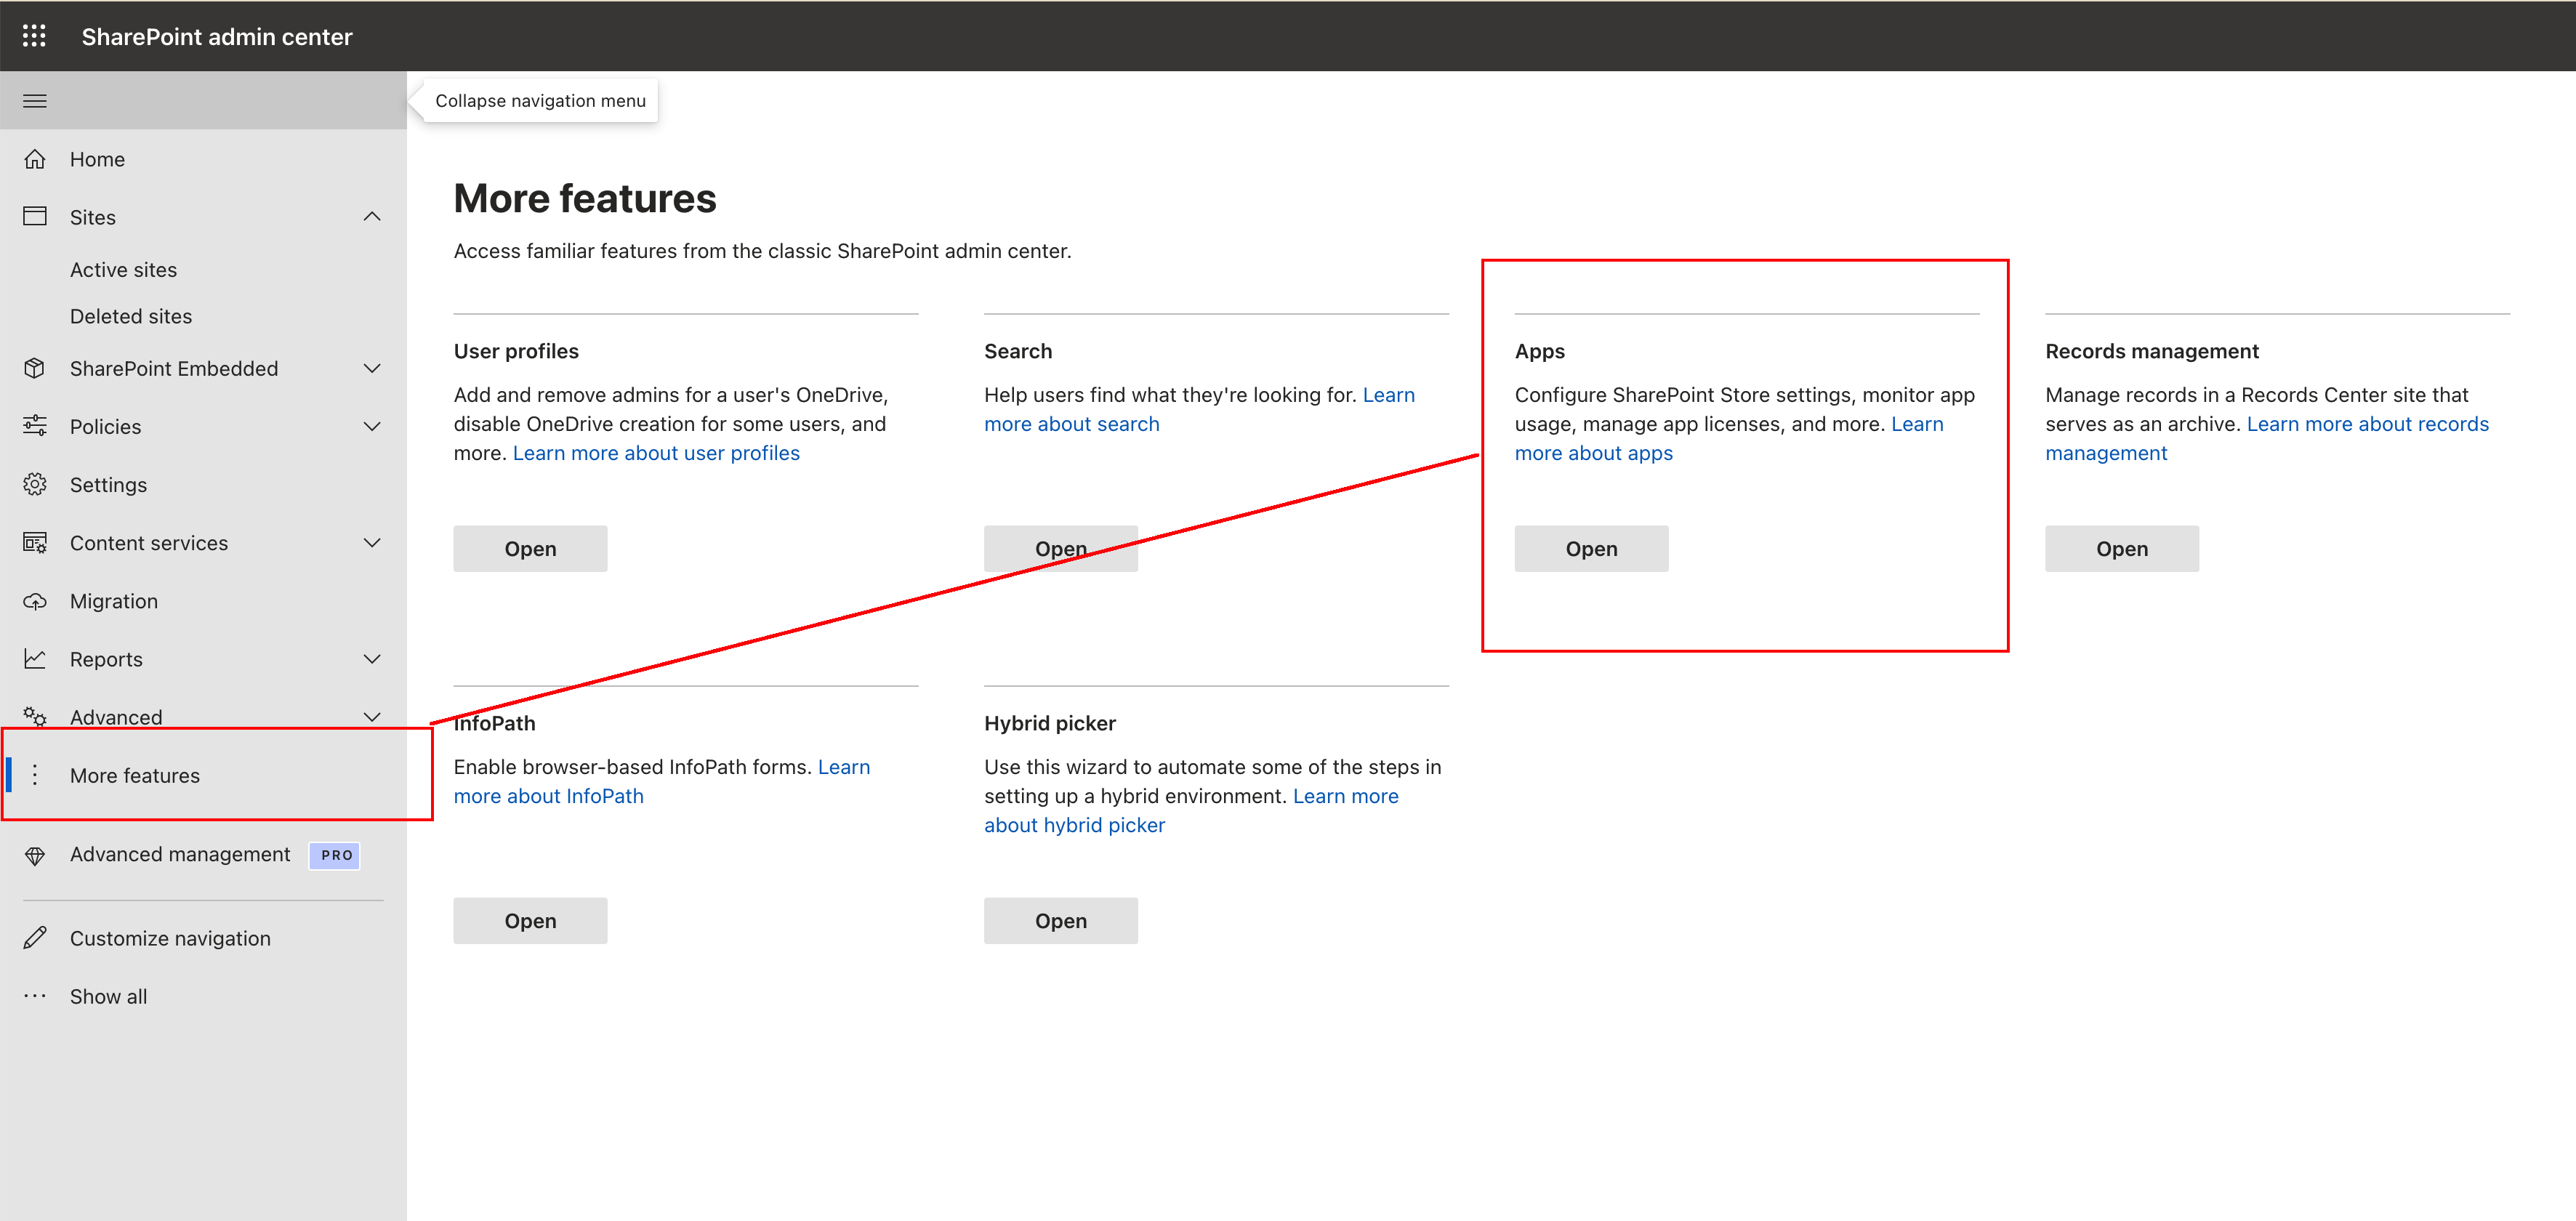
- Go to More features, then under Apps click Open.
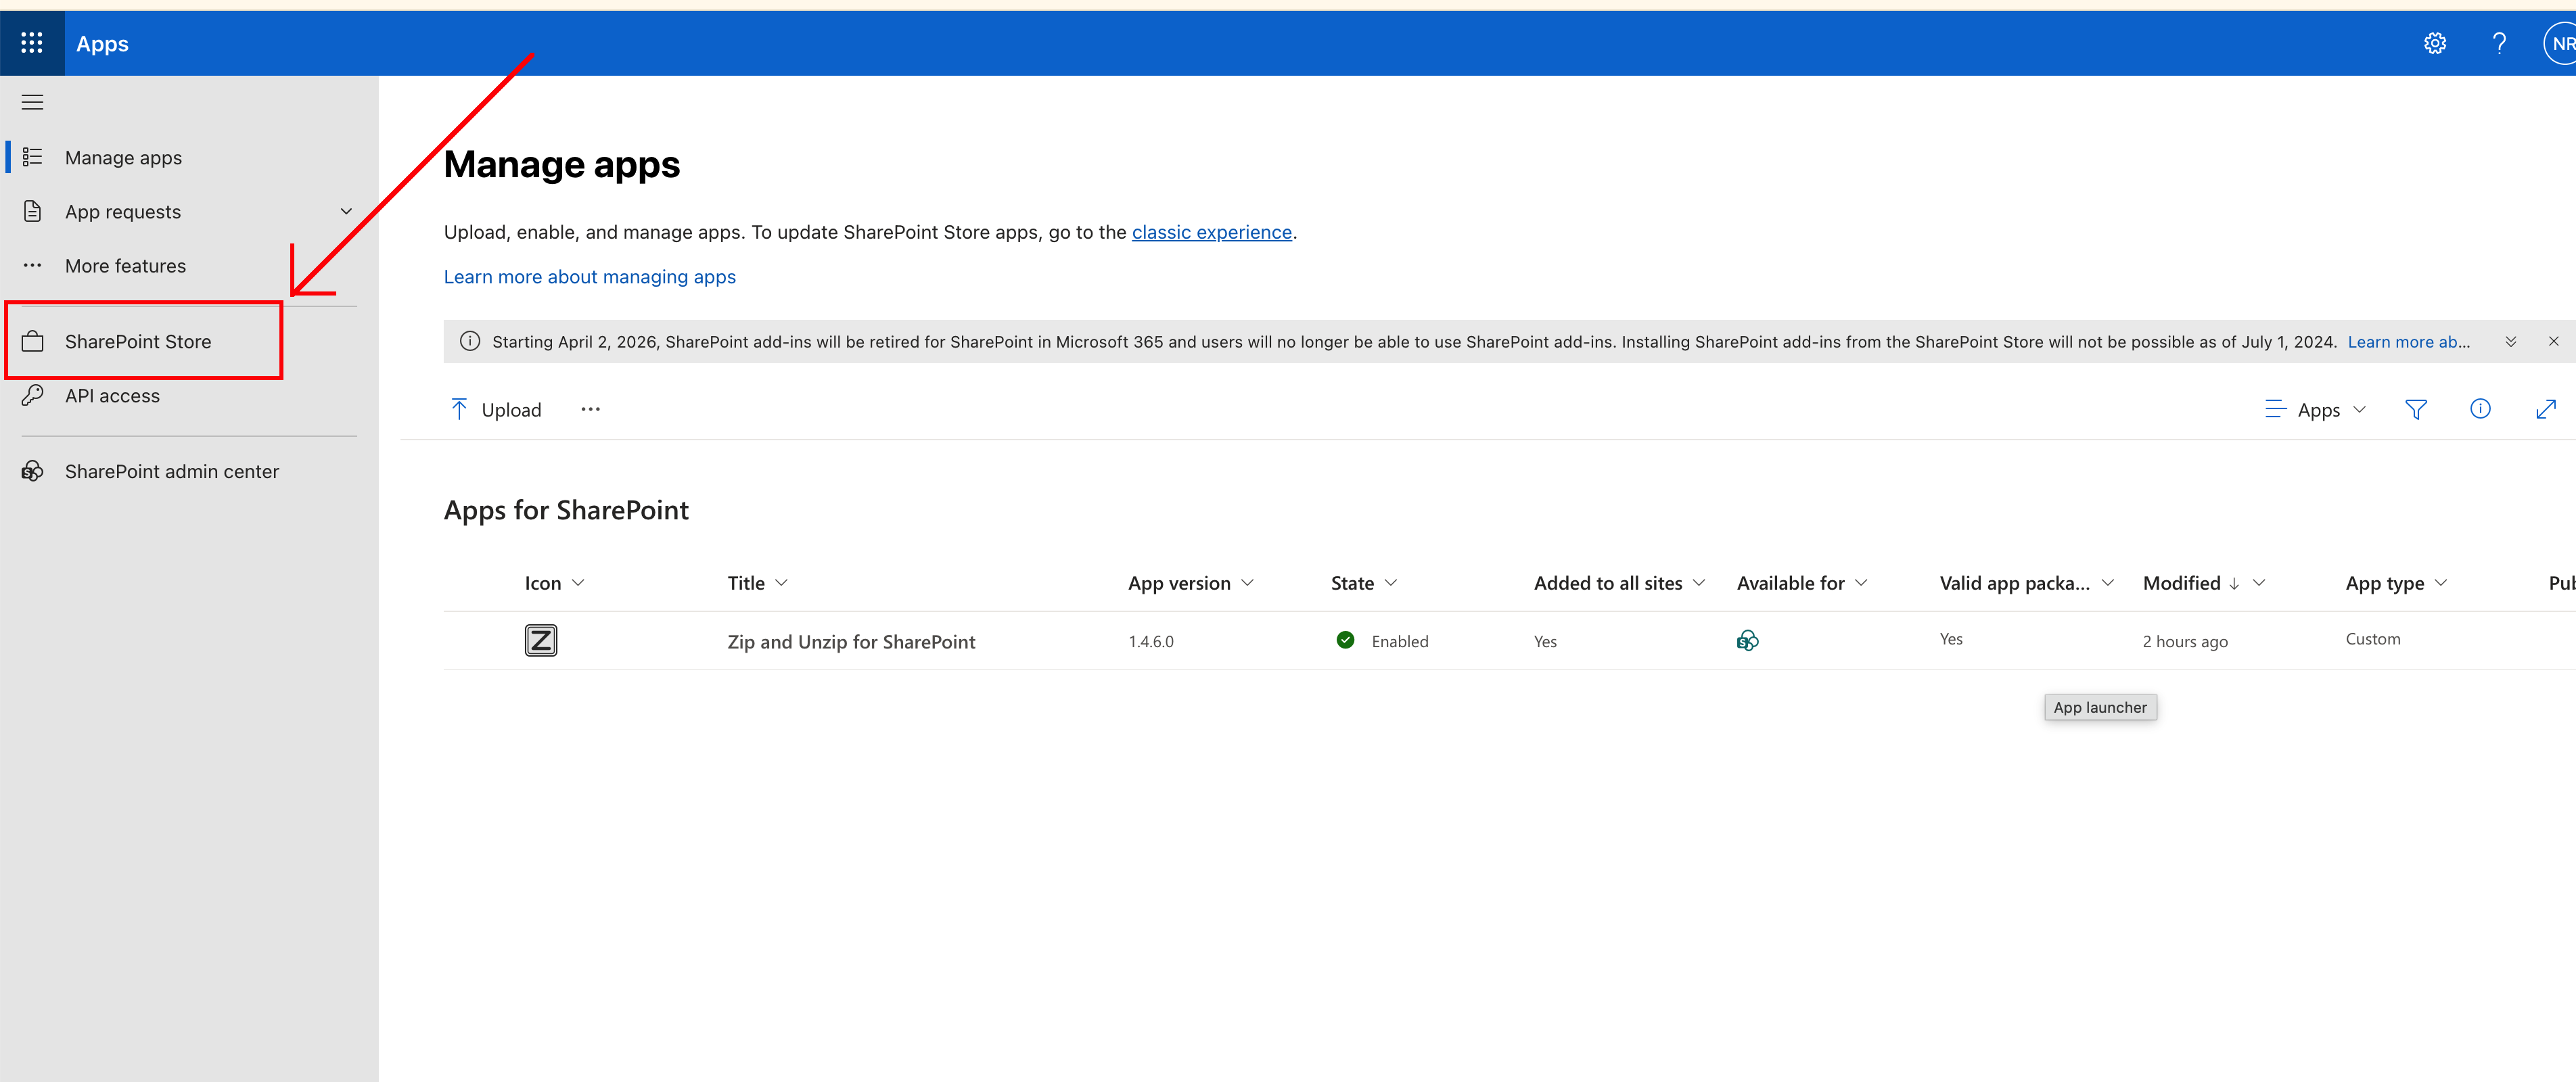
- Click App Store to open the SharePoint marketplace.
- Copy 1990Quebec and paste it into the SharePoint Store search box.
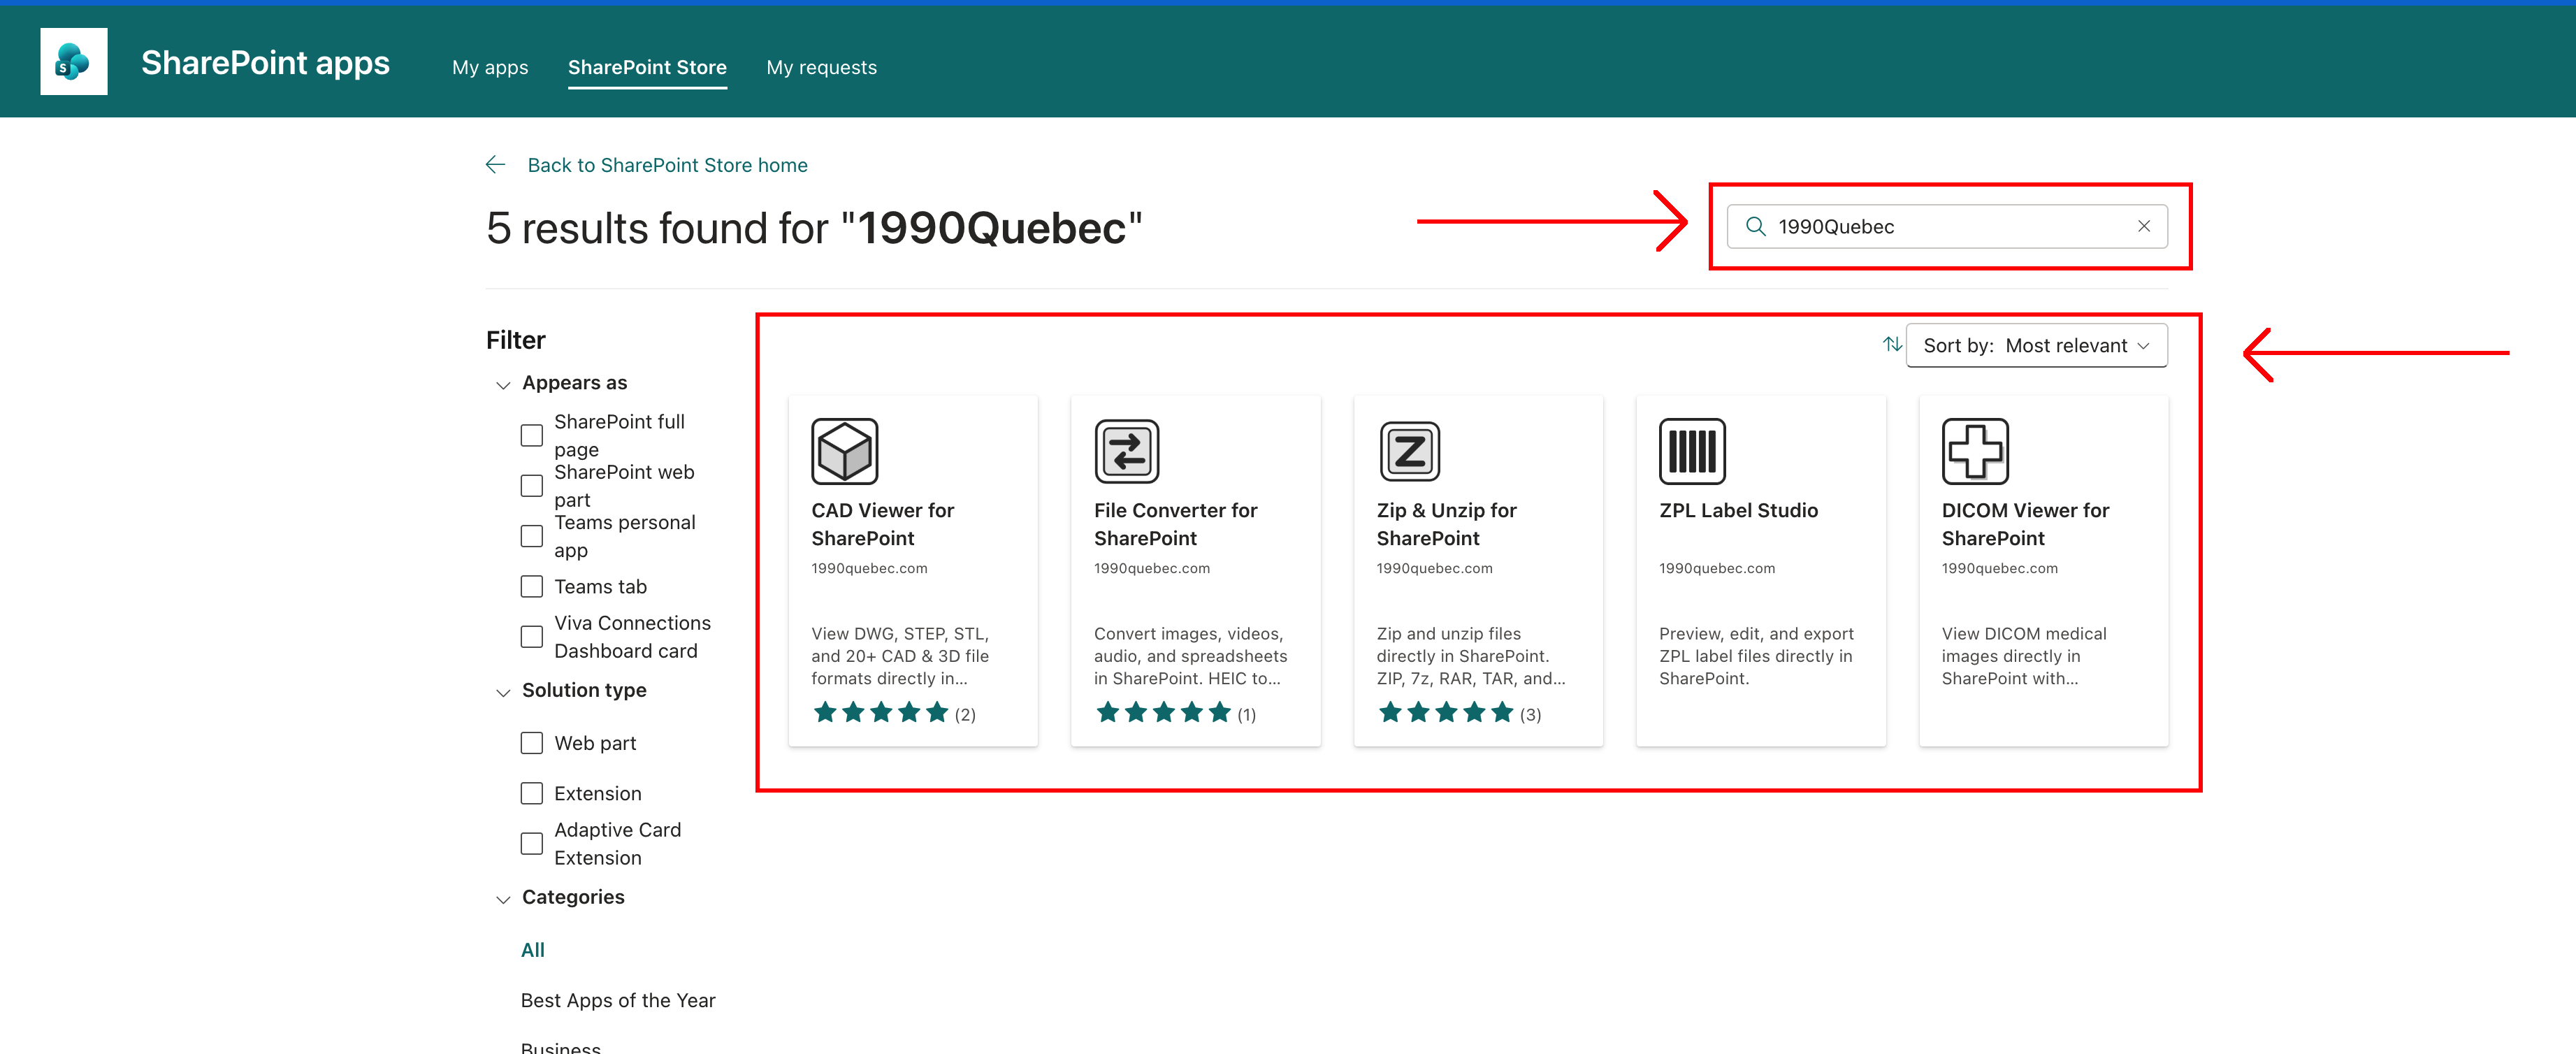
- Select CAD Viewer for SharePoint from the results to open its listing.
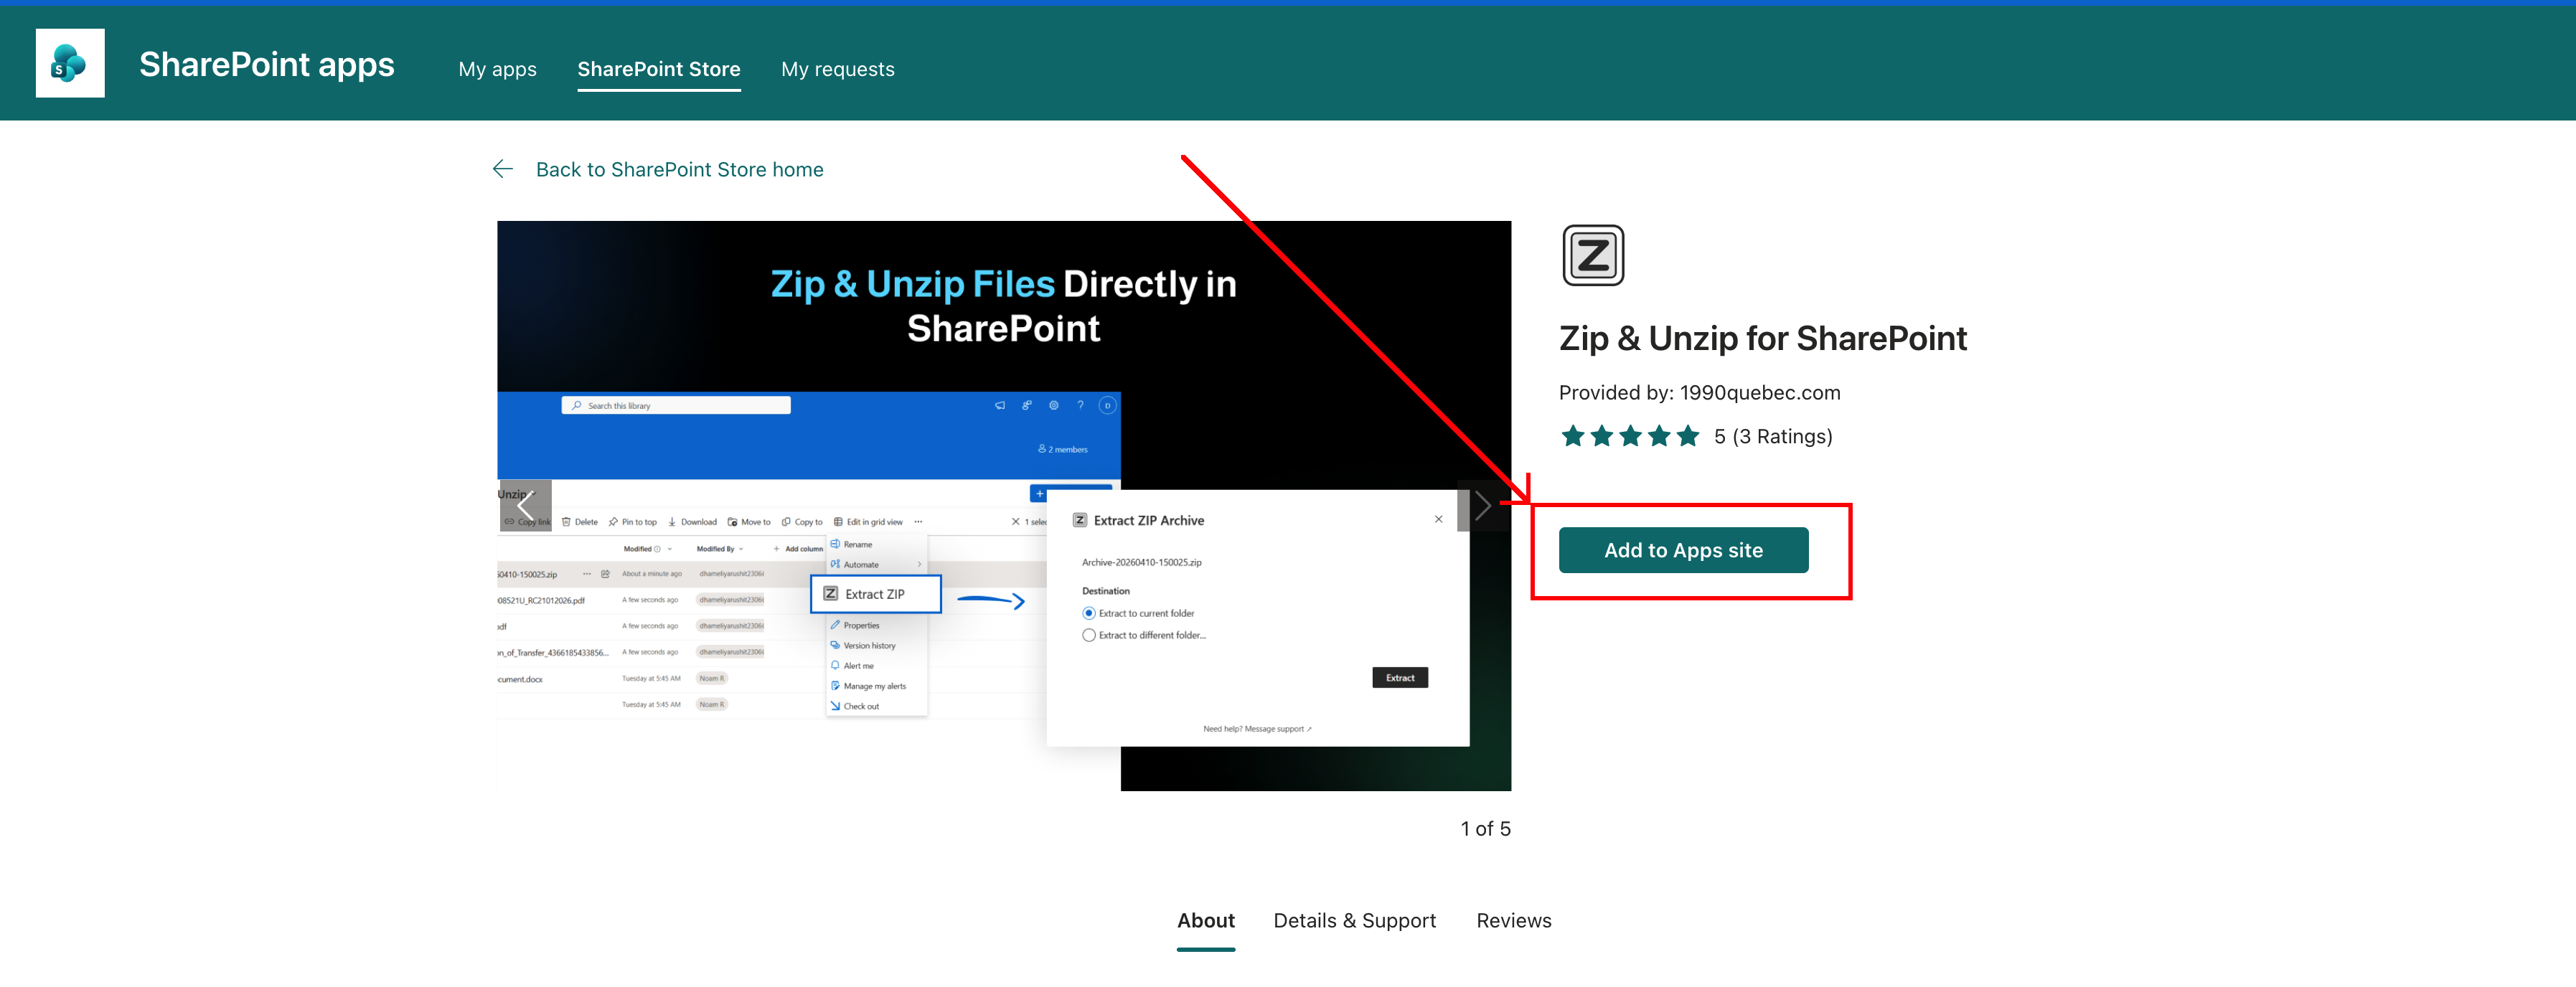
- On the listing page, click Add to Apps Site.
- When prompted by SharePoint, select Enable this app and add it to all sites.
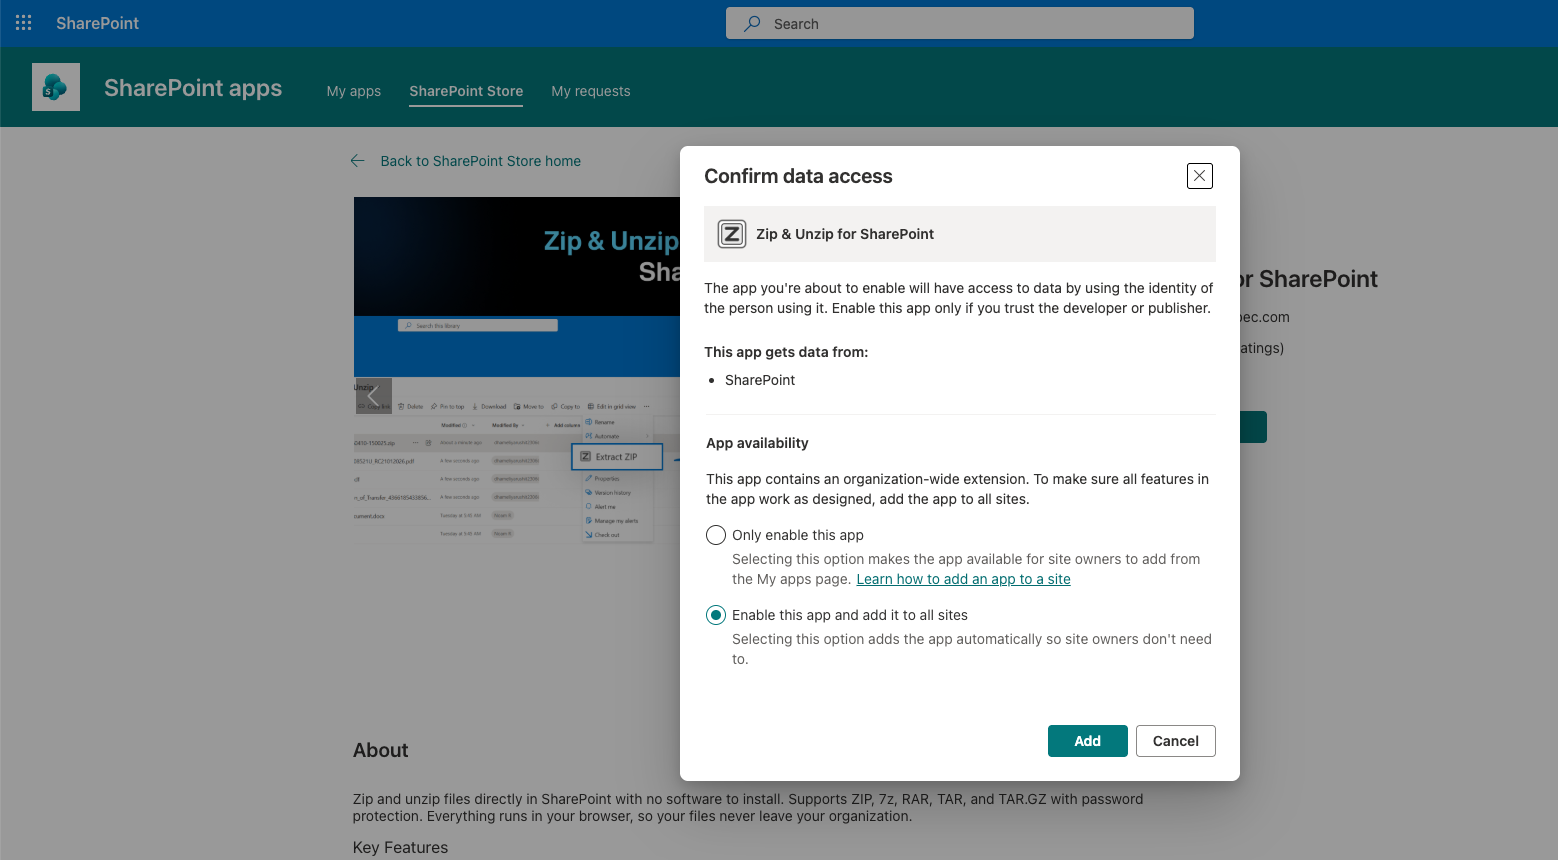
CAD Viewer is now available across your tenant. Without a license it runs as a limited free trial; you can get a license anytime, and all plans include a 60-day full refund guarantee.
Part 2: Open CAD files in SharePoint
- Open a document library that holds CAD files. CAD Viewer supports DWG, DXF, DWF, DWFX, STEP, IGES, STL, OBJ, IFC, and more.
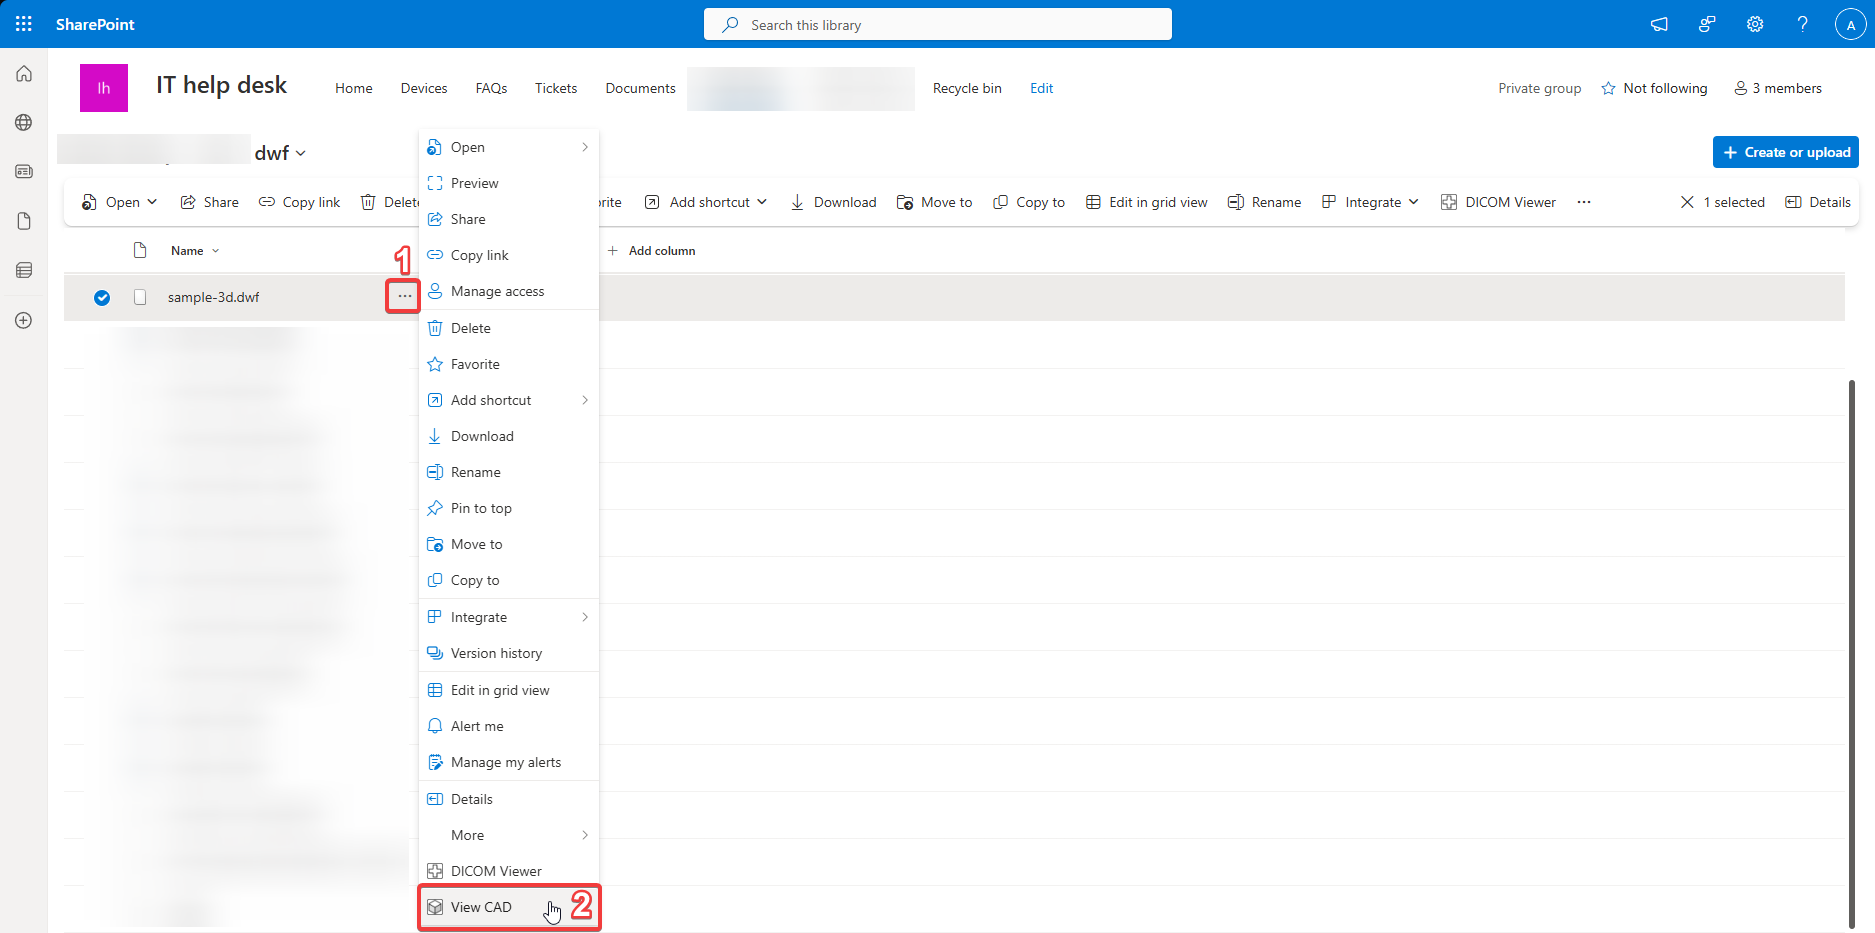
- Select a CAD file, open its ... (show actions) menu, then choose View CAD.
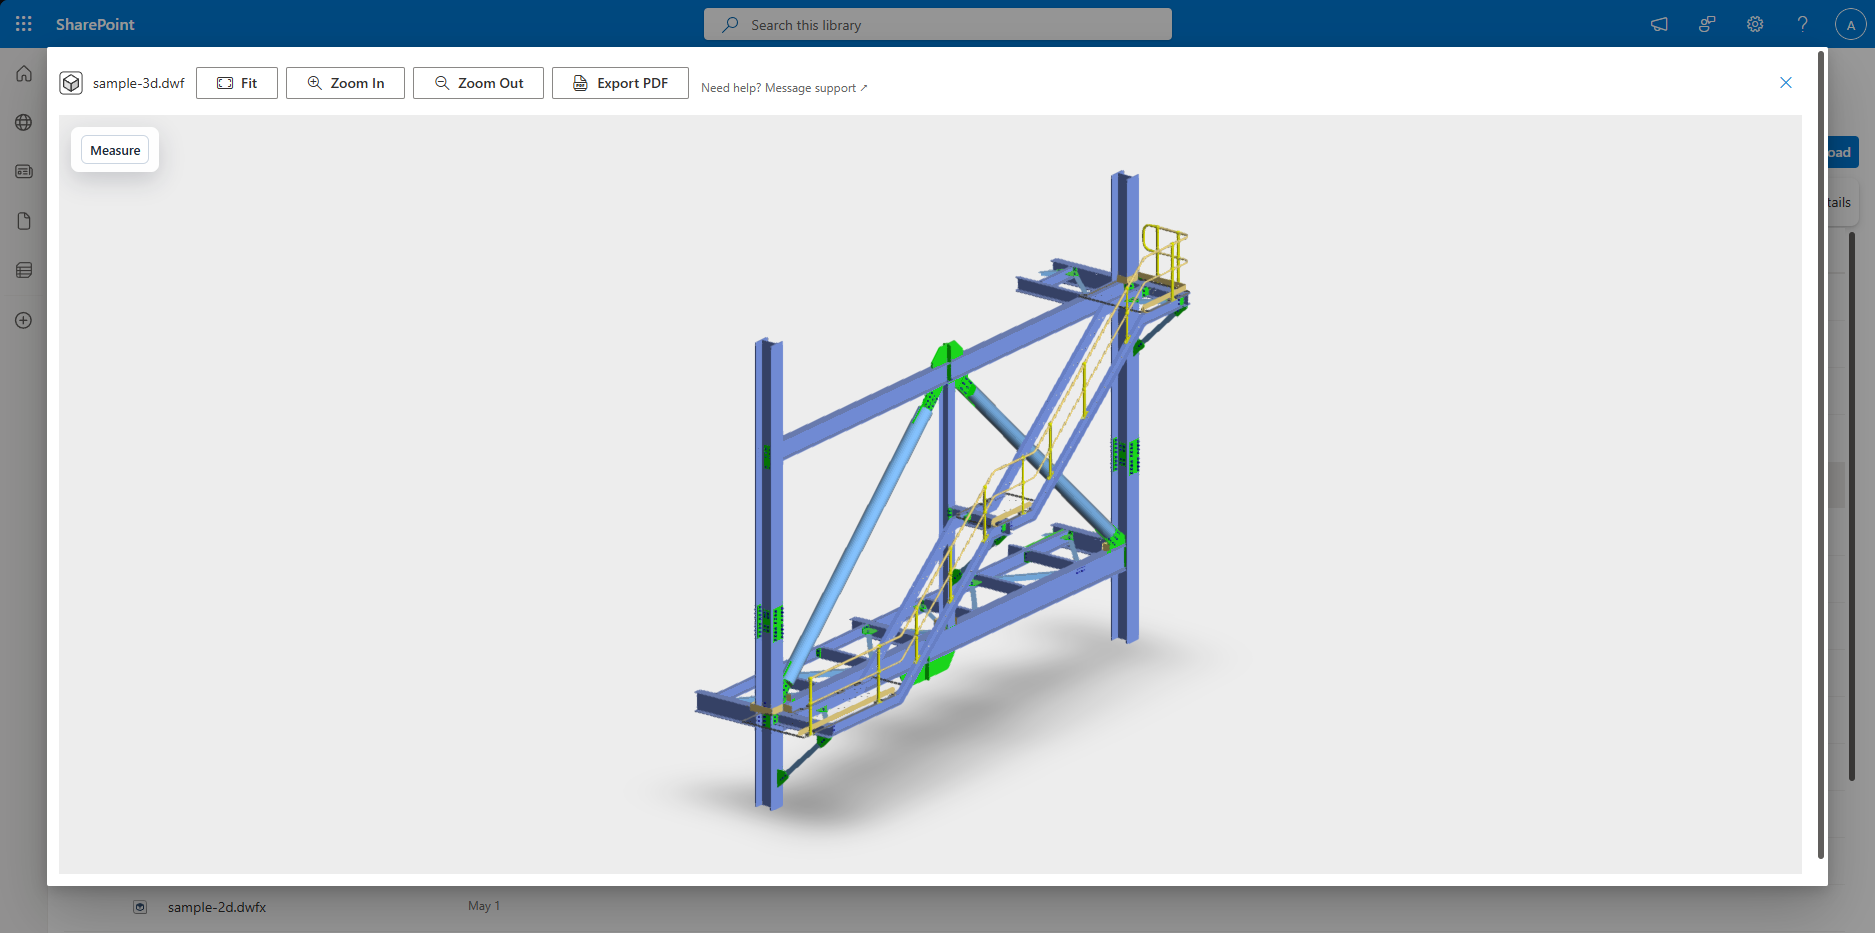
- The file opens in the viewer. Use Fit, Zoom In, Zoom Out, Measure, and Export PDF from the toolbar.
Part 3: Add a CAD Viewer tab in Teams
- In a Teams channel, click + (add a tab) at the top, then choose Apps.
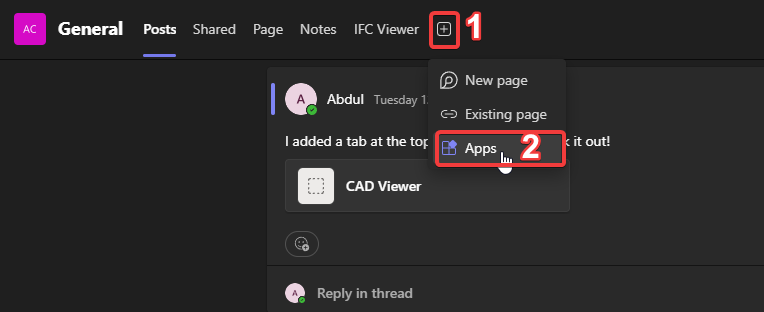
- Search for CAD Viewer and select it.
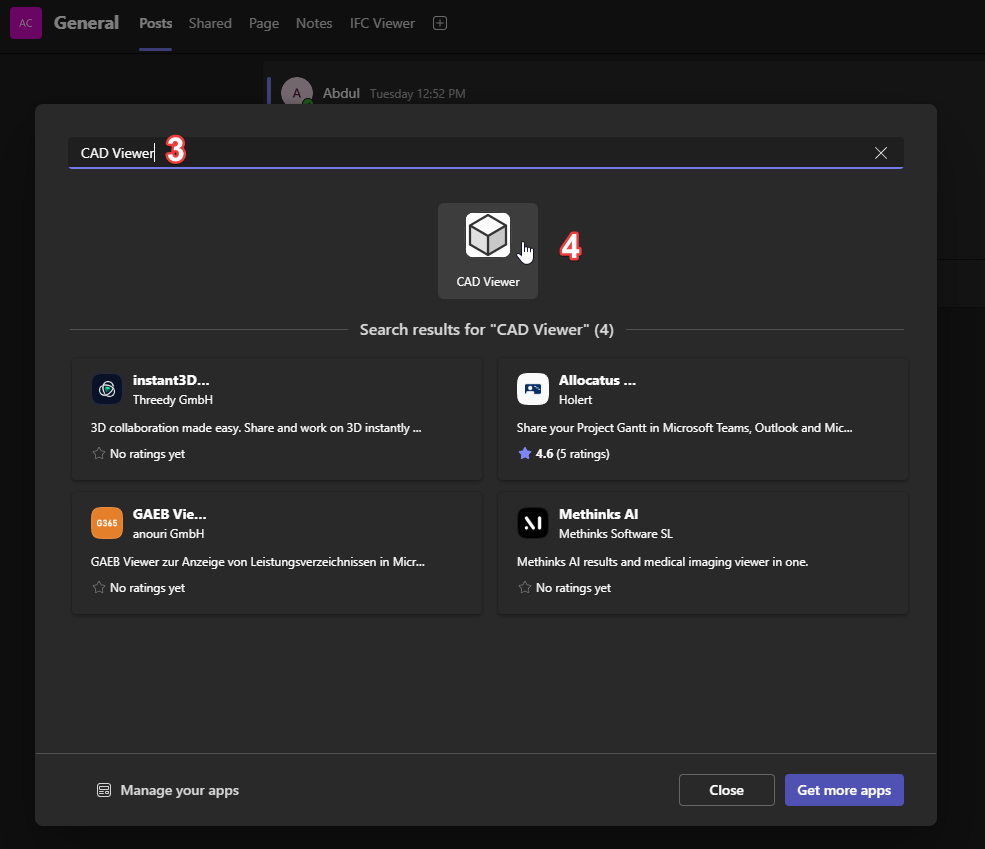
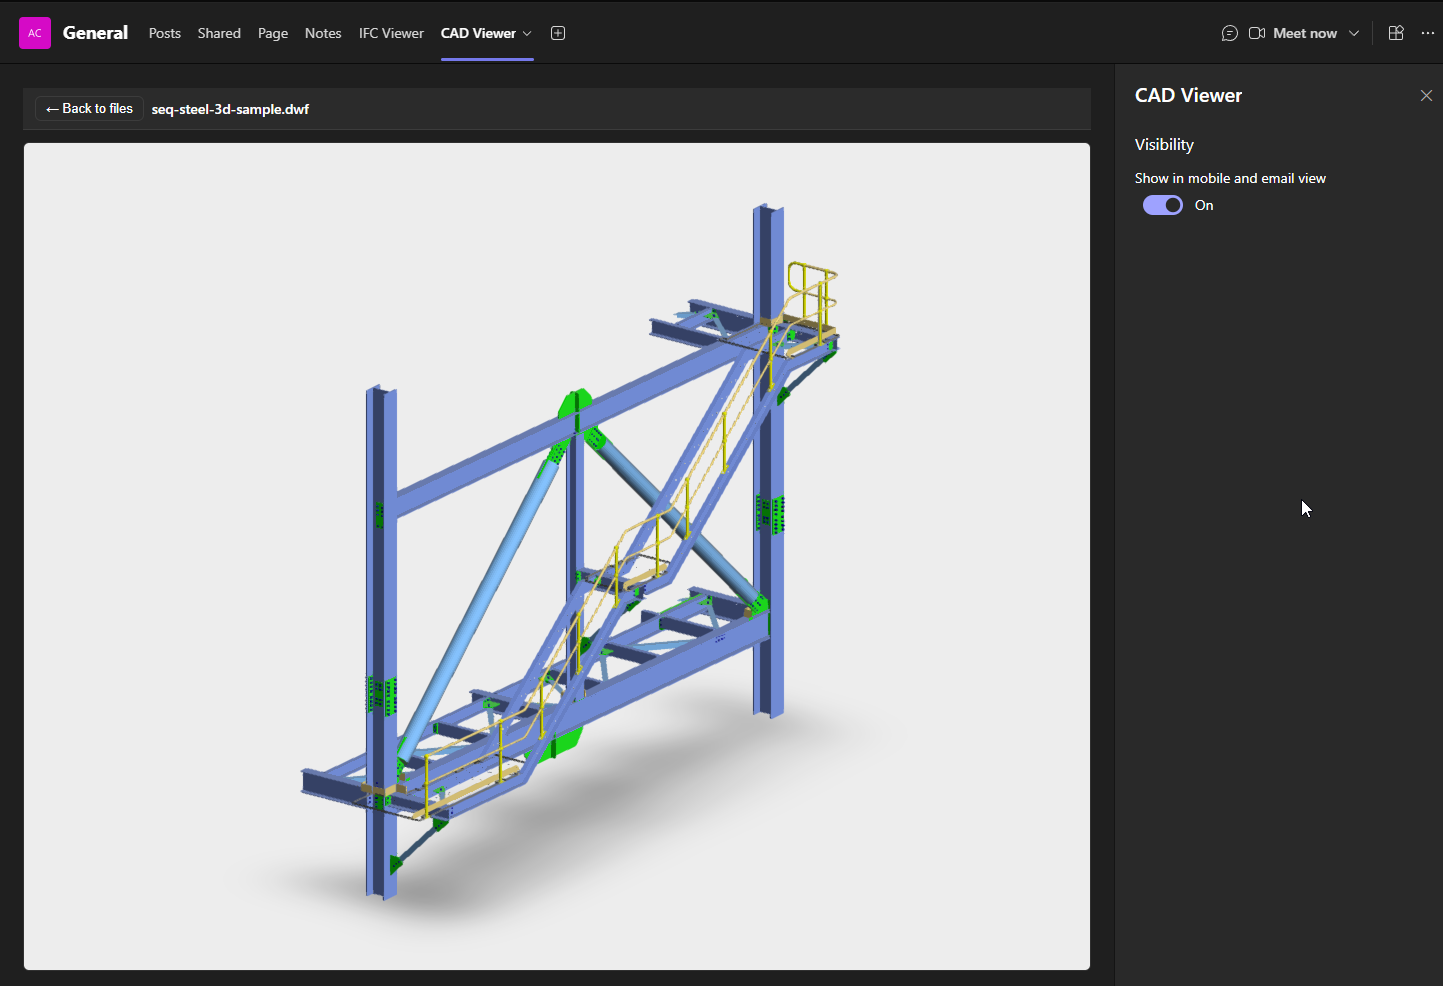
- The CAD Viewer tab lists the CAD files in the channel. Select one to open it directly in Teams.
Need help?
If you encounter issues or have questions, message support and we'll help.