
This guide shows how to open the Apps page in SharePoint admin center, remove an older version if one is already listed, and upload the new .sppkg package.
An .sppkg file is the package file that contains the SharePoint add-in or plugin you want to install.
Admin prerequisite: You must be a SharePoint Administrator or higher in Microsoft 365.
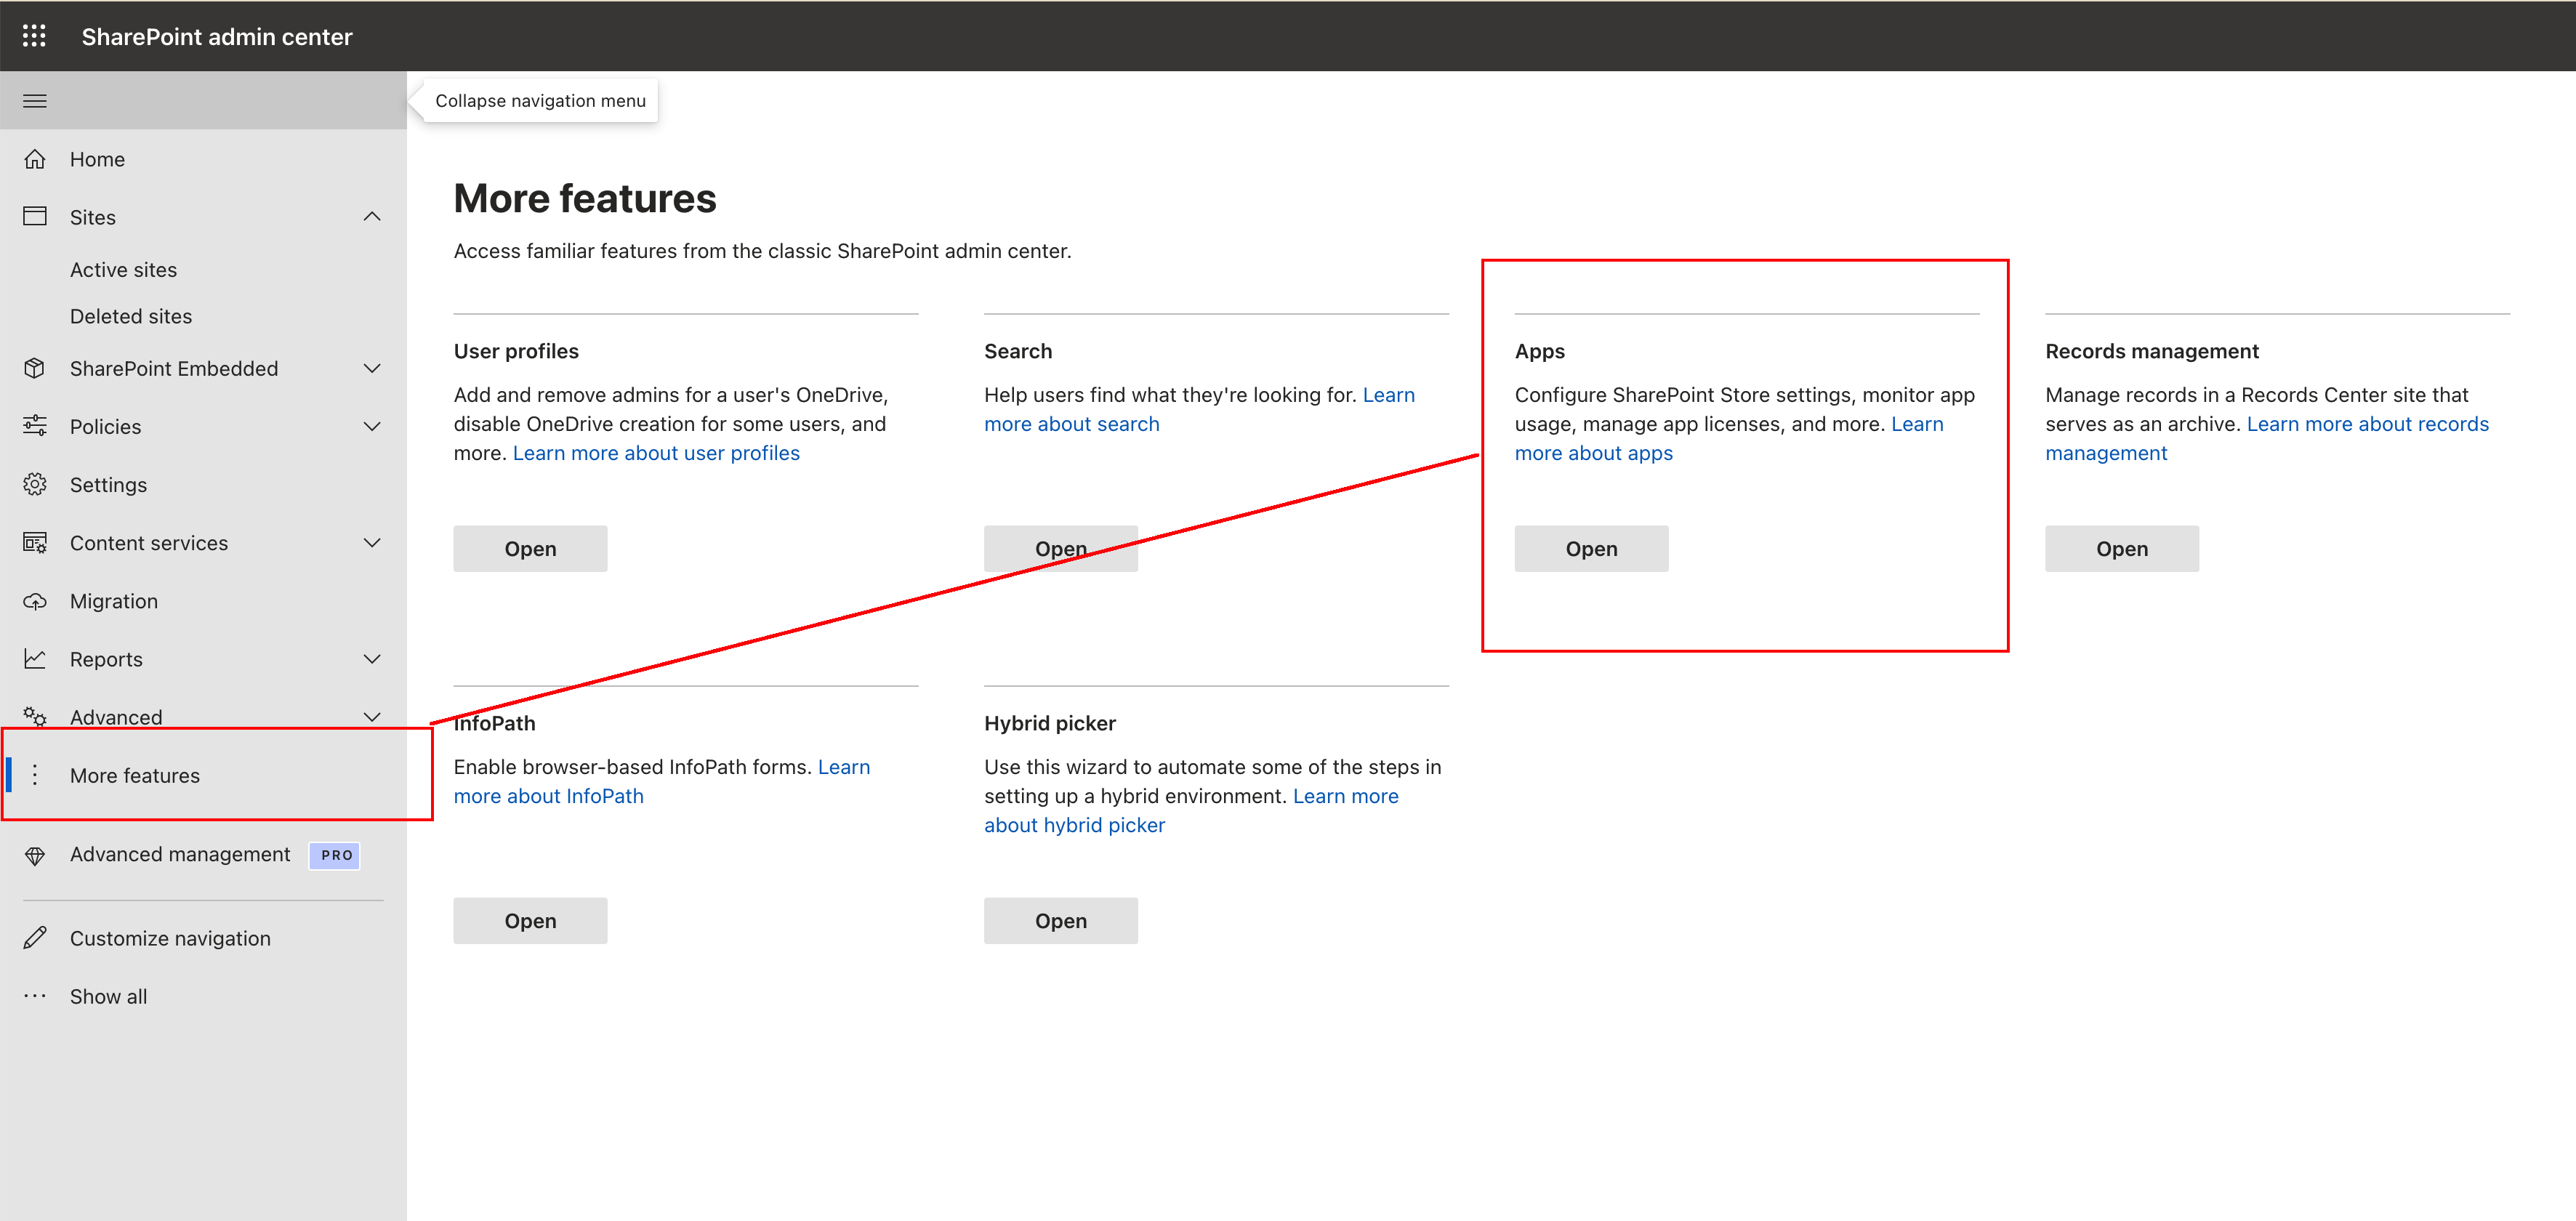
Step 1: Open the Apps page in SharePoint admin center
Go to the SharePoint admin center, open More features, then under Apps click Open.
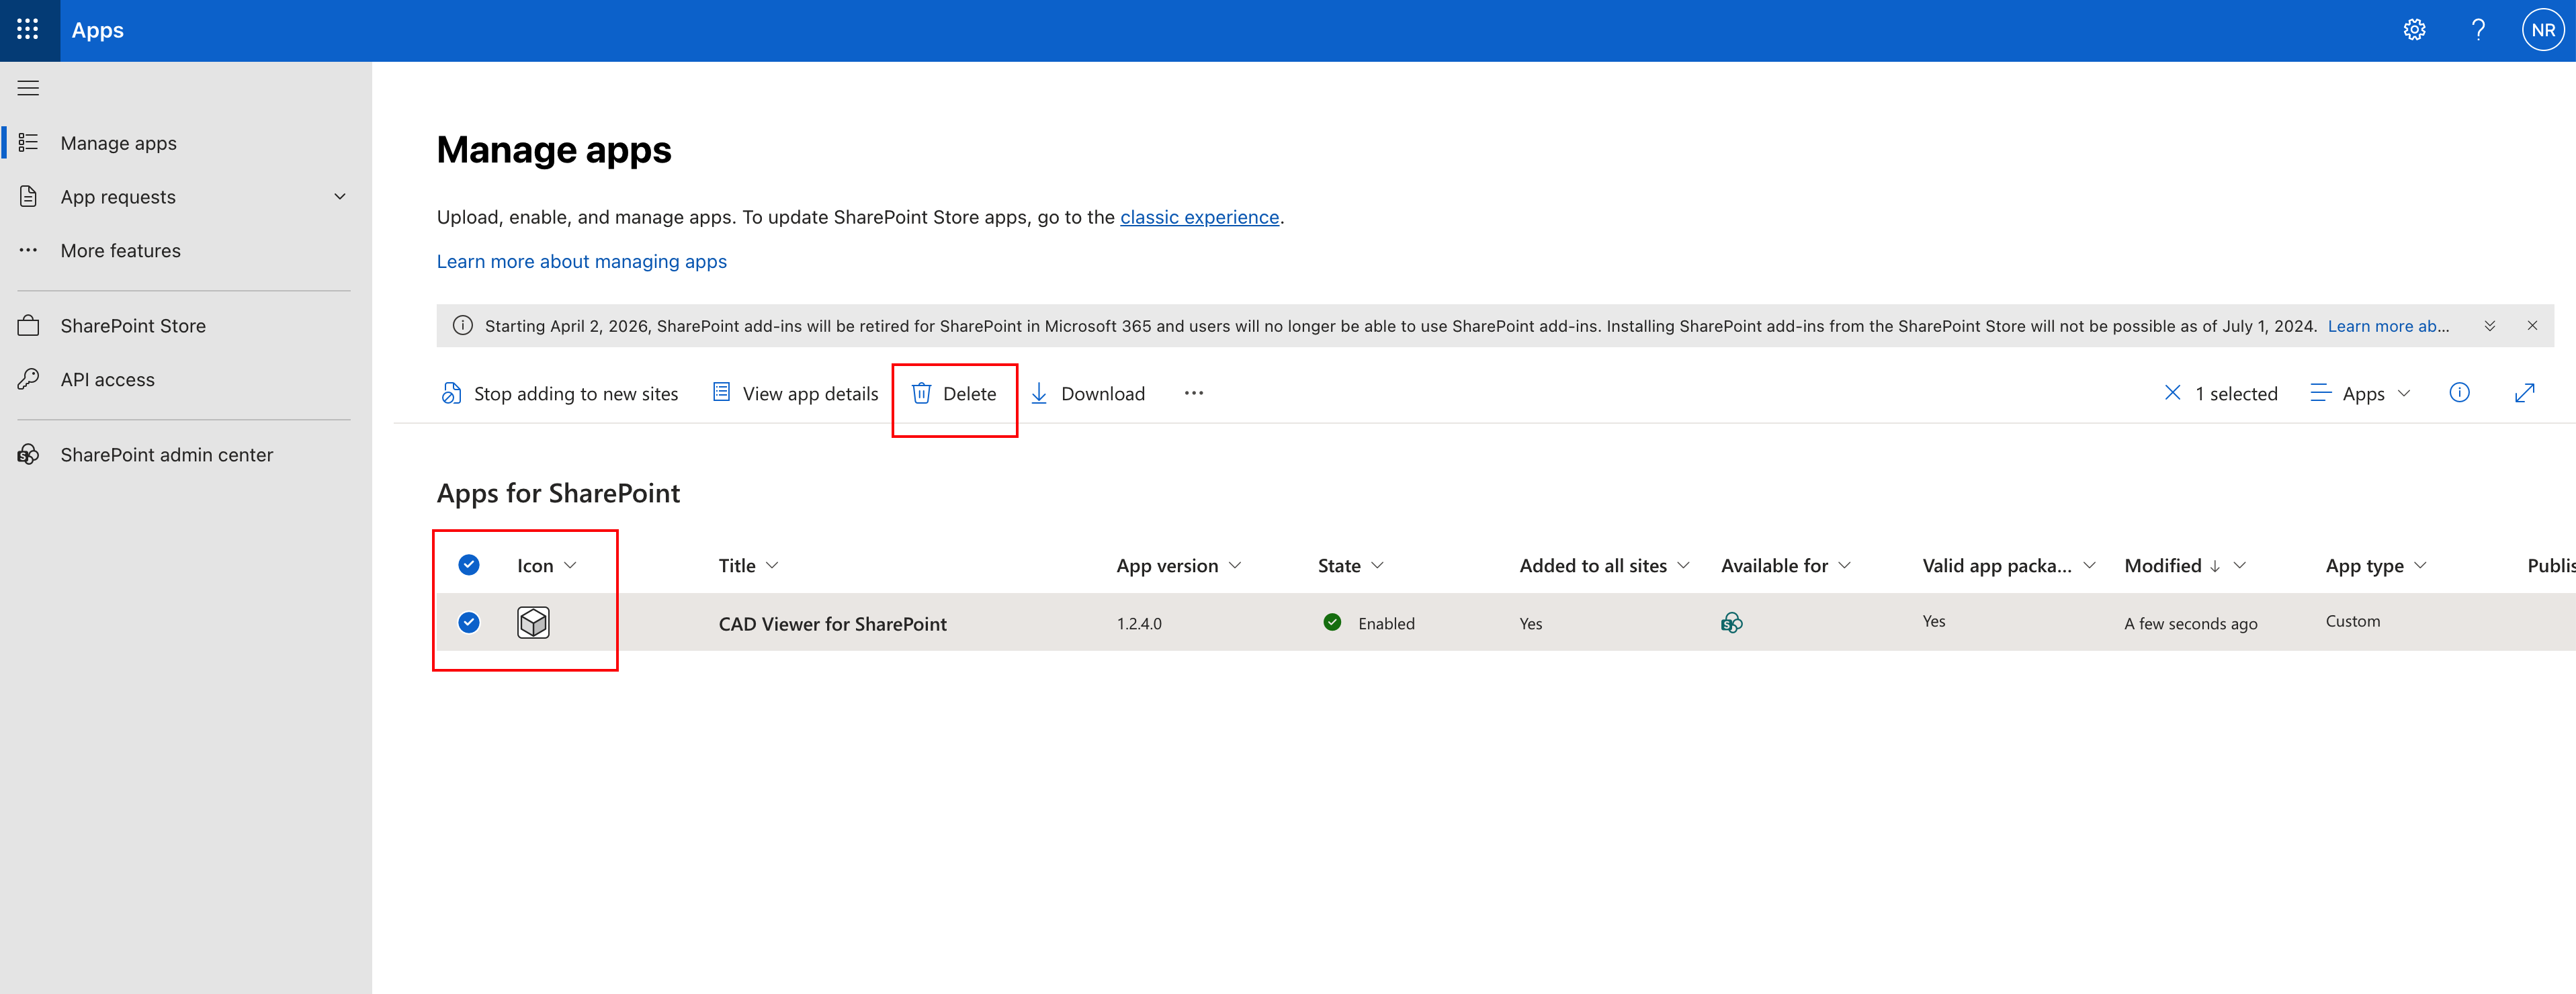
Step 2: Delete the existing app first
If the app already appears in Manage apps, select it and click Delete. This keeps the app list clean before you upload the new .sppkg file.
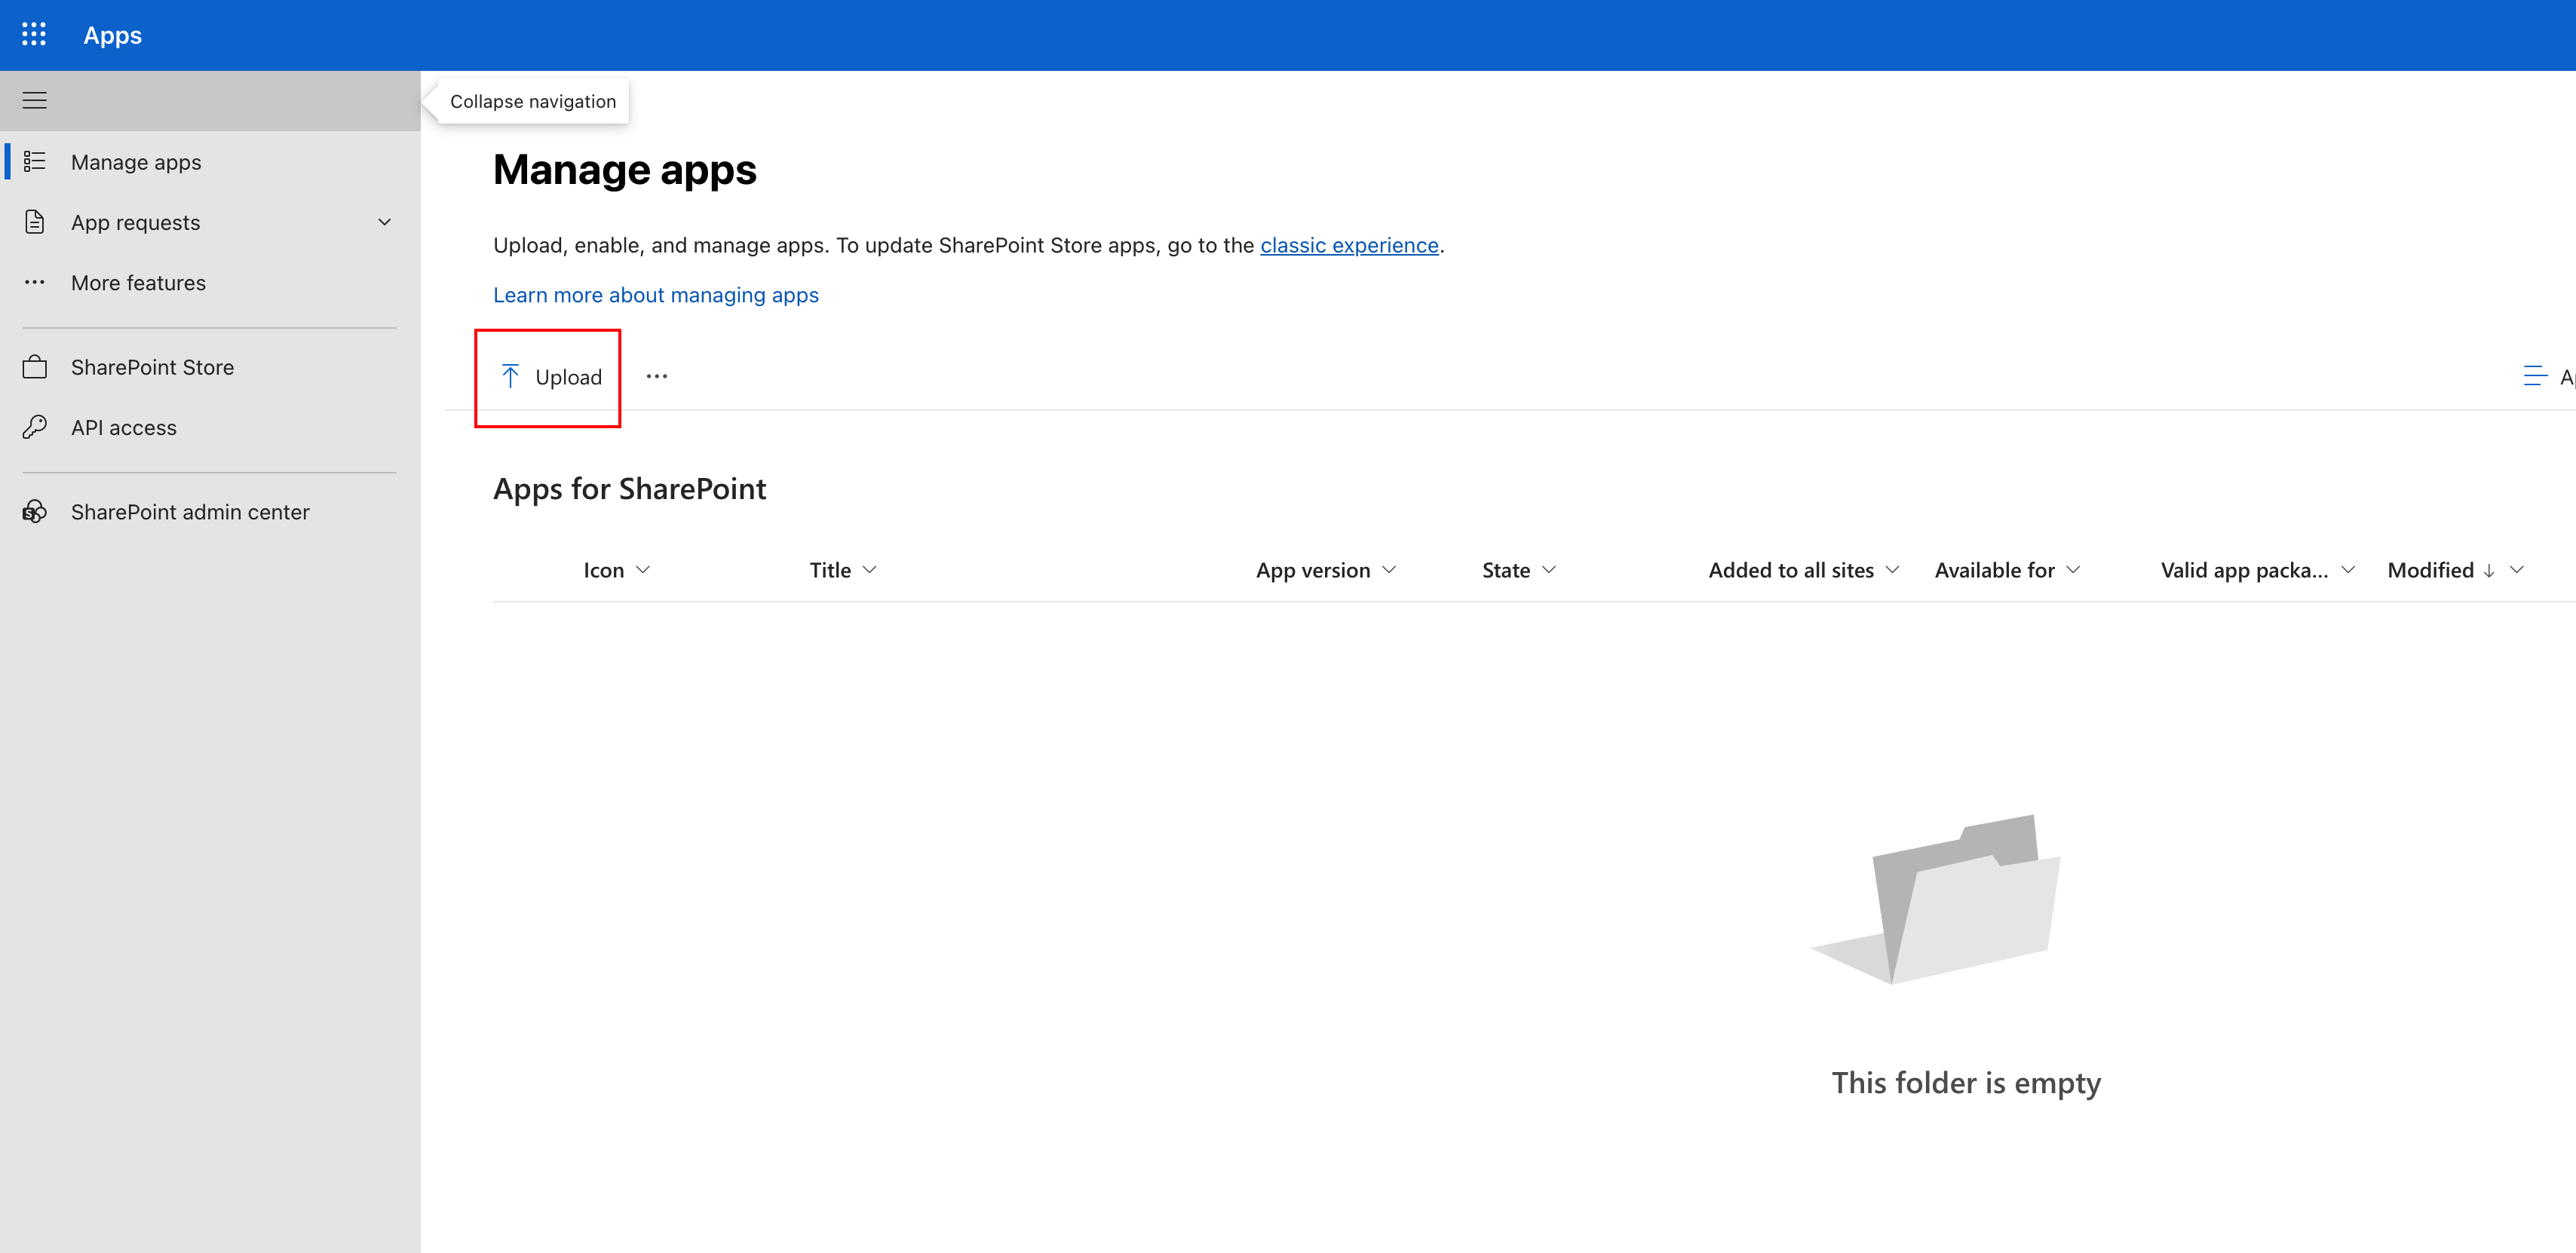
Step 3: Upload your .sppkg file
On the Manage apps page, click Upload and choose the .sppkg file. If SharePoint asks you to confirm or enable the app, approve it to finish the upload.
Need more detail?
Microsoft has a longer admin guide here: Manage apps using the Apps site.