
Microsoft 365 administrators can enable or disable multifactor authentication (MFA) for individual users. This guide shows how.
Required permission: You must have permission to manage authentication settings in Microsoft 365.
Open per-user multifactor authentication
The quickest option is to open Per-user multifactor authentication directly in Microsoft Entra.
If the shortcut does not work, use the next section to navigate from the Microsoft 365 admin center.
Open the page from Microsoft 365 admin center
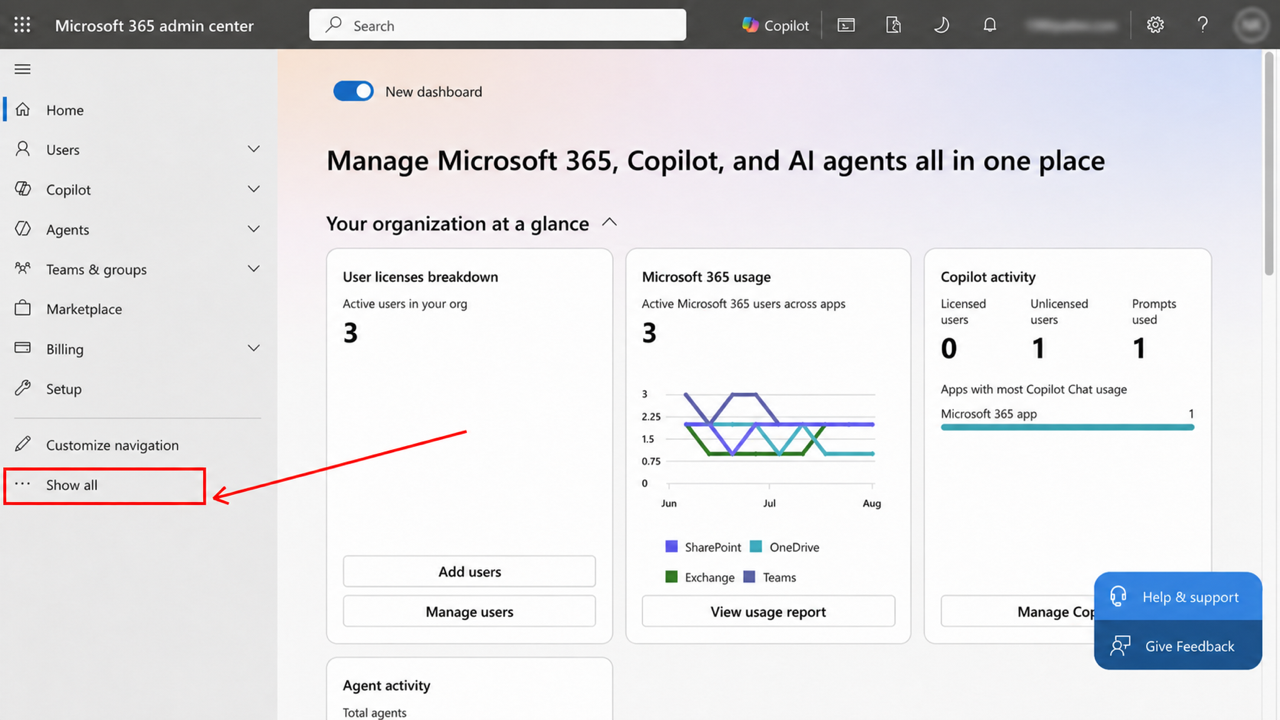
- Open the Microsoft 365 admin center, then click Show all in the left navigation.
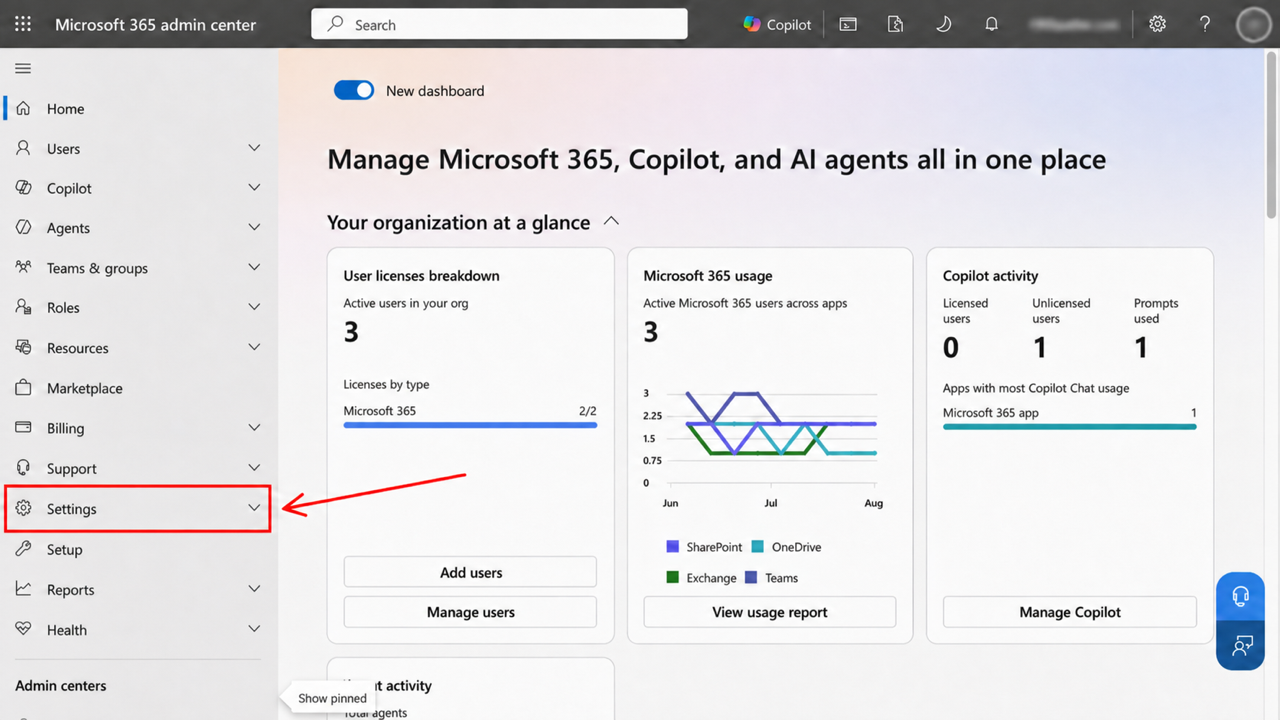
- In the expanded navigation, click Settings.
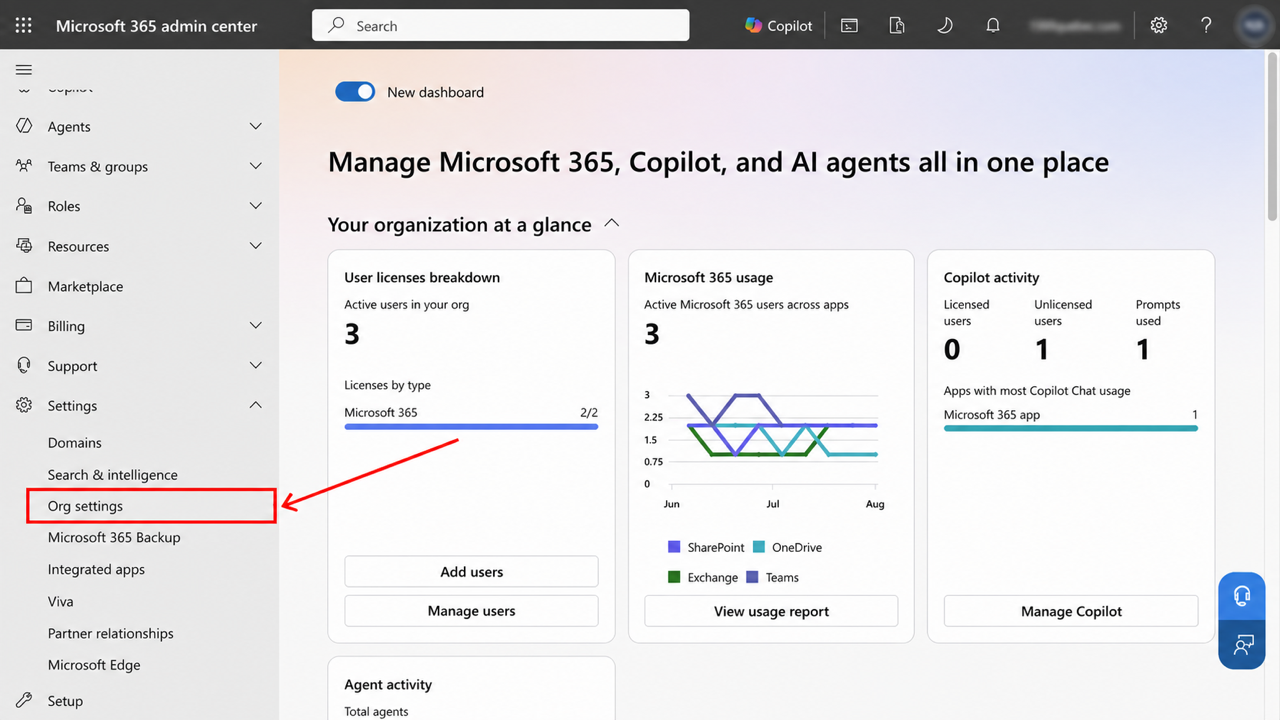
- Under Settings, click Org settings.
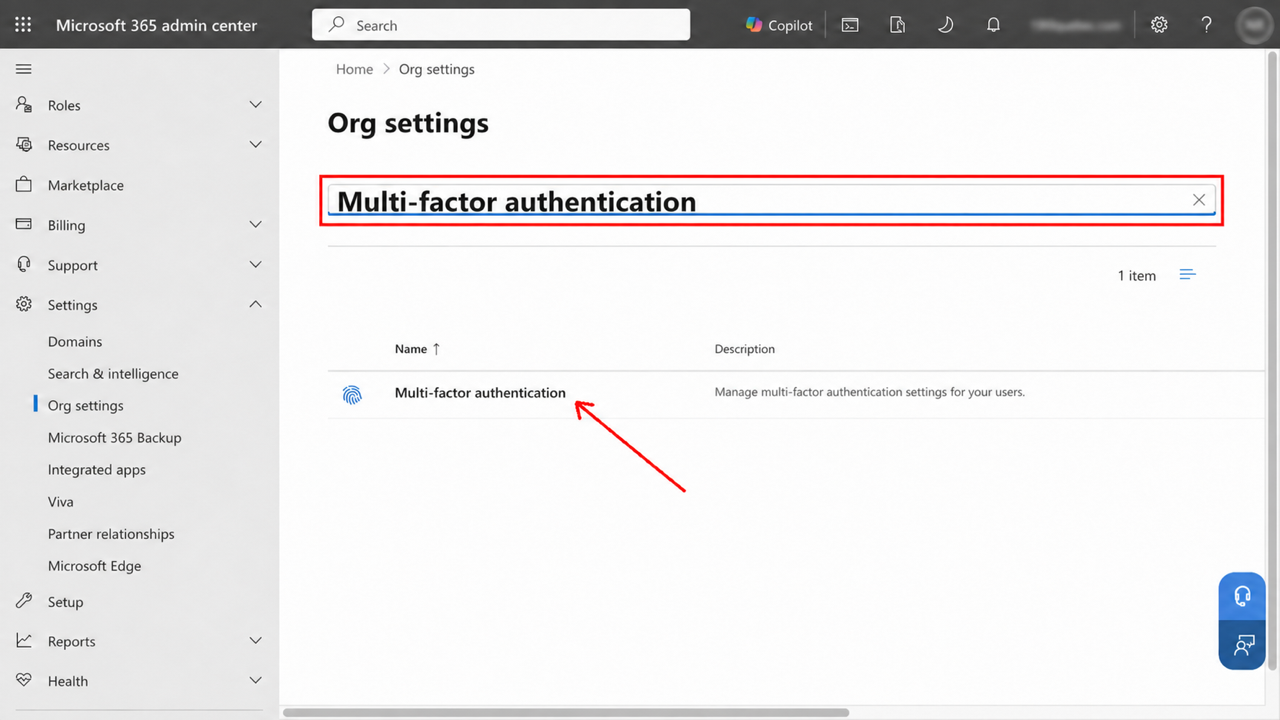
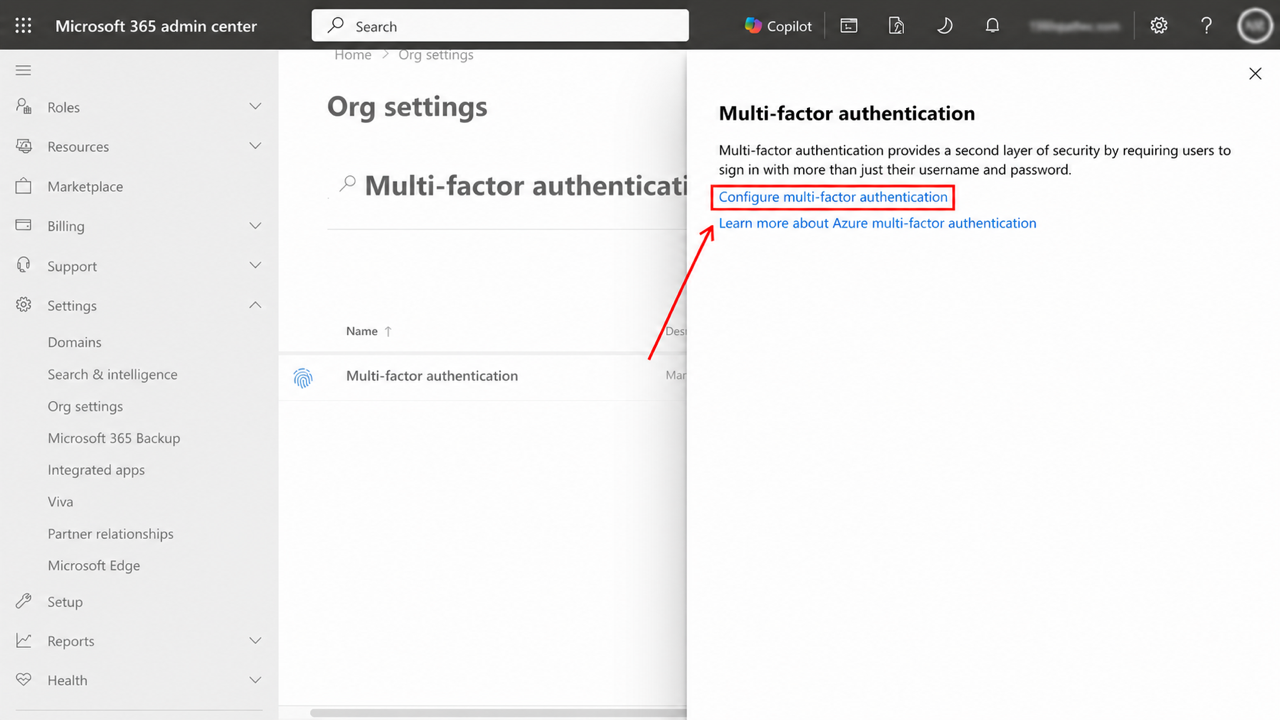
- On the Services tab, search for Multi-factor authentication, then click the result.
- In the panel, click Configure multi-factor authentication. Microsoft Entra opens the per-user MFA page.
Enable or disable MFA for a user
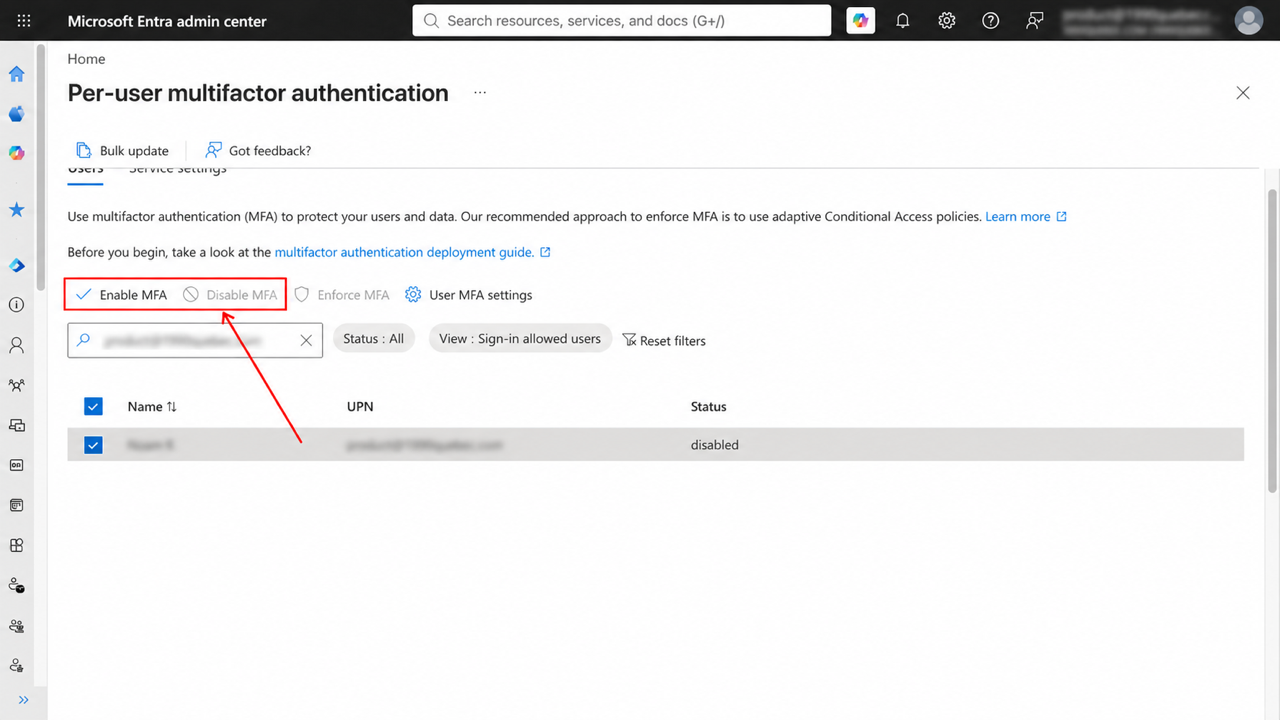
- Search for the user, then select the checkbox beside their account.
- Check the user's current Status.
- Click Enable MFA if the status is disabled. Click Disable MFA if MFA is already enabled or enforced.
- Review the confirmation, then confirm the change.
Use Conditional Access for tenant-wide MFA
Per-user MFA manages one account at a time. To require MFA across your organization, use Conditional Access instead.
Review Microsoft's Conditional Access MFA guidance and multifactor authentication deployment guide.